


28
Using LAN card/LAN terminal Streaming and Capturing Video
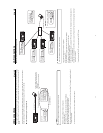
The SA-DV6000 can send video on a pre-recorded DV tape or video from the video input of BR-DV6000.
Capturing (save to disk) of video transmitted by means of streaming can be started/ended on the Client PC. There are three trigger
modes that are supported that, in combination with the trigger mode of the provided application software, enable the VTR operator to
start and stop the recording onto the PC hard drive.
● TRIG – This mode is used to simultaneously record video onto a DV tape and a PC disk. Recording to both is controlled by the REC
and PLAY button on the BR-DV6000 VTR. The PC user must have the trigger mode of Streamcapture or Streamproducer enabled.
● SPLIT – This mode allows independent record to DV tape or PC disk. Recording to DV tape is controlled by the REC and PLAY button
as normal. Recording to the PC disk is controlled by the VTR’s SET button. In this mode it is not necessary to have a tape loaded in
the VTR. The PC user must have the trigger mode of Streamcapture or Streamproducer enabled.
● OFF – This disables the VTR operators’ control of the PC recording. VTR operation is as normal. The PC user can control the saving
of the video on the computer. Instructions for using this mode can be found in the Trigger mode function of the Streamproducer Users
Guide.
Memo
When performing a different type of transmission, switch the PB/DV IN setting in the SYSTEM menu of the VTR. In addition, set the
INPUT SELECT switch of the VTR to “DV”.
29
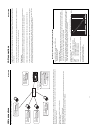
Using LAN card/LAN terminal
Recording to DV tape and Client PC Simultaneously
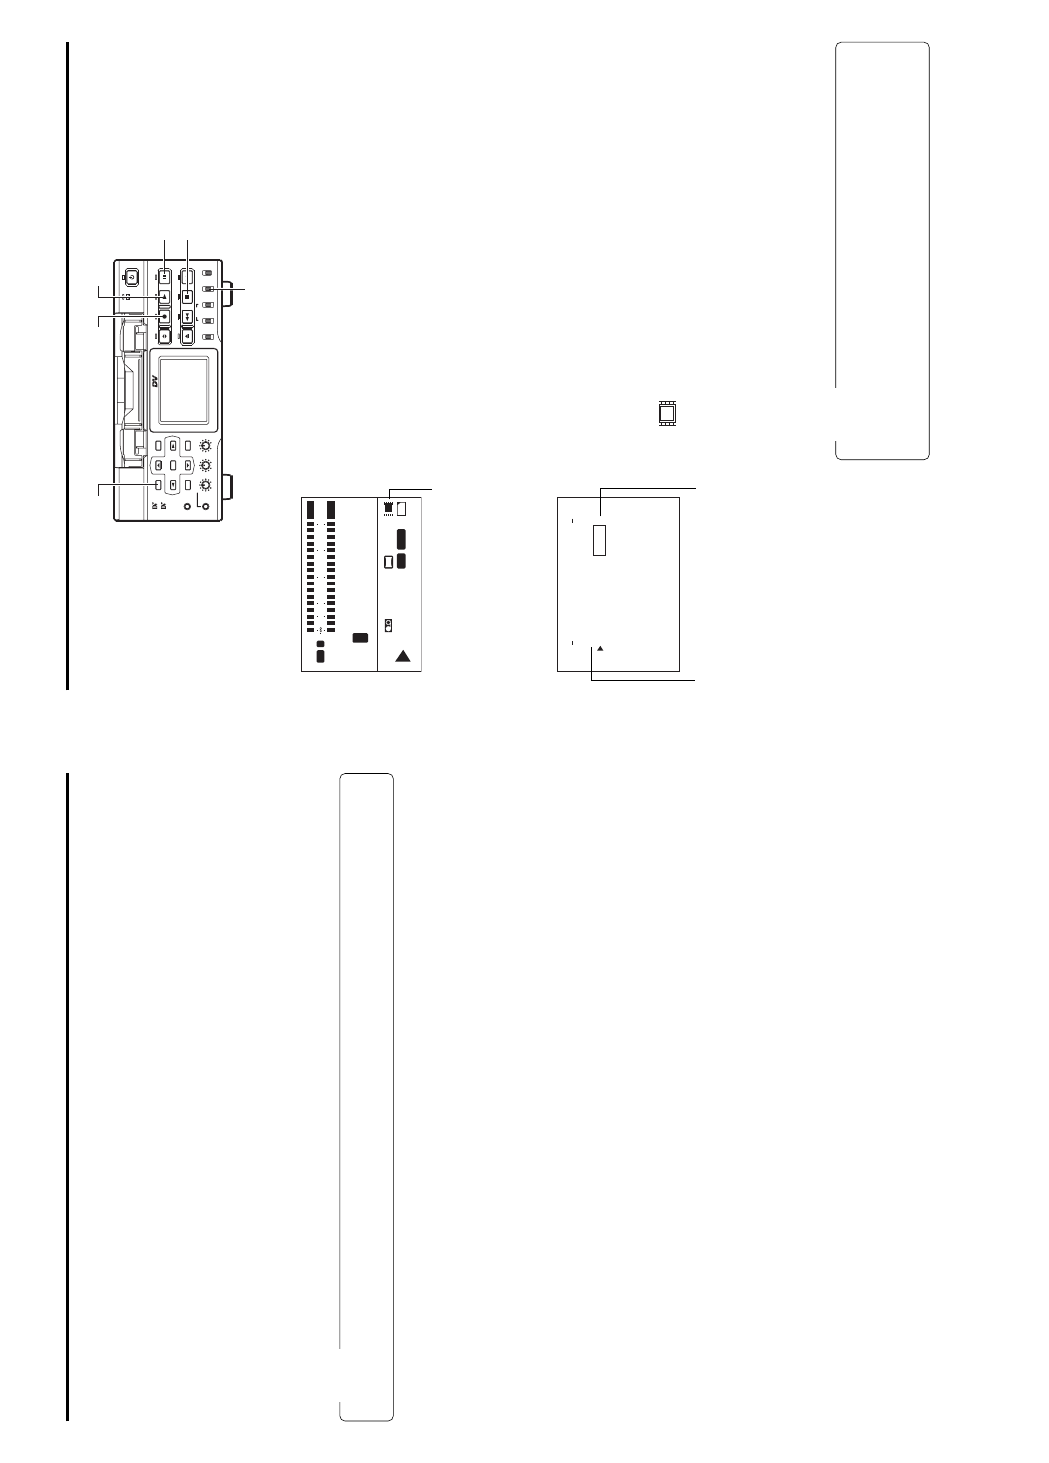
Set to TRIG
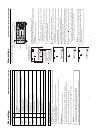
1.
Insert a LAN card into the Network Pack, or connect a LAN cable into the LAN
terminal.
2.
Turn on the BR-DV6000 power.
Check to see that the LAN card display is showing on the LCD screen. (When
using a LAN card)
3.
Select the input signal using the INPUT SELECT switch.
4.
Insert a recordable DV cassette tape.
5.
Press the MENU button to display the TOP MENU screen.
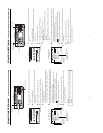
6.
Set the NETWORK PACK CONFIG menu screen.
q Set MPEG REC to “TRIG”.
w Set the video/audio compress in the ENCODE SETUP menu screen. (
☞
page 8)
e When completed, press the MENU button to return to the normal screen.
7.
When pressing the REC and PLAY buttons of the BR-DV6000 with Streamproducer
or Streamcapture software operating in the Trigger more, recording to the DV
cassette tape and Client PC will start simultaneously.
(Hold down the REC button then press the PLAY button. If the PLAY button is
pressed first, the video may flicker momentarily.)
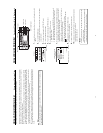
● The LAN card display on the LCD screen will be as follows:
e
: Red display during data transmission. (When using a LAN card)
8.
To stop transmission or recording, press the PAUSE button.
● BR-DV6000 will be in the standby mode.
9.
To resume transmission or recording, press the PALY button.
10
.
To end operation, press the STOP button to stop transmission then disconnect
network connection. Then turn off the power.
Lastly, remove the LAN card.
Memo
● Streaming data will be sent from the LAN card or LAN terminal even when a DV
cassette tape is not inserted.
● When the DV cassette tape reaches the end during recording, the transmission
of streaming data from the LAN card/LAN terminal is also stopped.
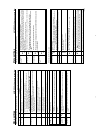
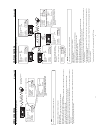
LCD screen
LAN card display
CH1
NDF
12H 34M 34S10F
FREE
CH2
PLAY
SP222
min
01/02/03
01:23:45 INS
AM
OVER
48k
T
C
L
dB010203040
OVER
W
Y/C
VA
SYNC
‰
e
CF
NETWORK PACK CONFIG
menu screen
NET WORK
ORTWENKACK
P
ON
C
IG
F
ENCODE
MPEG REC
T
RGI
MOV I E
C
LI
PS
MENU R ES ET
PAGE B
A
CK
..
..
SET
ET
P
U
P
U
T..SE P
U
M
AIN
(
W
M
Pund
r
8
)
e
NCELCA
(
C
F
View
r
)
e
TC 00:00: 000.0
ENCODE SETUP menu screen
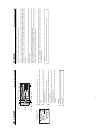
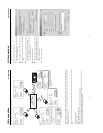
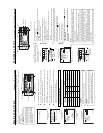
BR-DV6000
PROFESSIONAL
MENU RESET
A.DUB
EJECT
COUNTER
AUDIO INPUT
SELECT
MONITOR OUTPUT REMOTE
LOCAL
CTL L
MIX
R
CH-1/2
MIX
CH-3/4
DV
LINE
Y/C
(CPN)
TC
UB
REW STOP FF
REC
OPERATE
PLAY PAUSE
DISP
SET SEARCH+
BLANK CUE UP
HOLD
PHONES REC LEVEL
CH-1/3 CH-2/4
MIC
SEARCH–
Mini
PLAY button
PAUSE button
STOP button
INPUT SELECT switch
REC buttonMENU button