


64
Others About updating the network pack
The network pack firmware version can be updated.
For details concerning version update data, visit the JVC homepage.
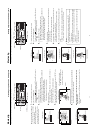
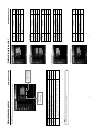
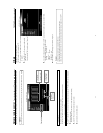
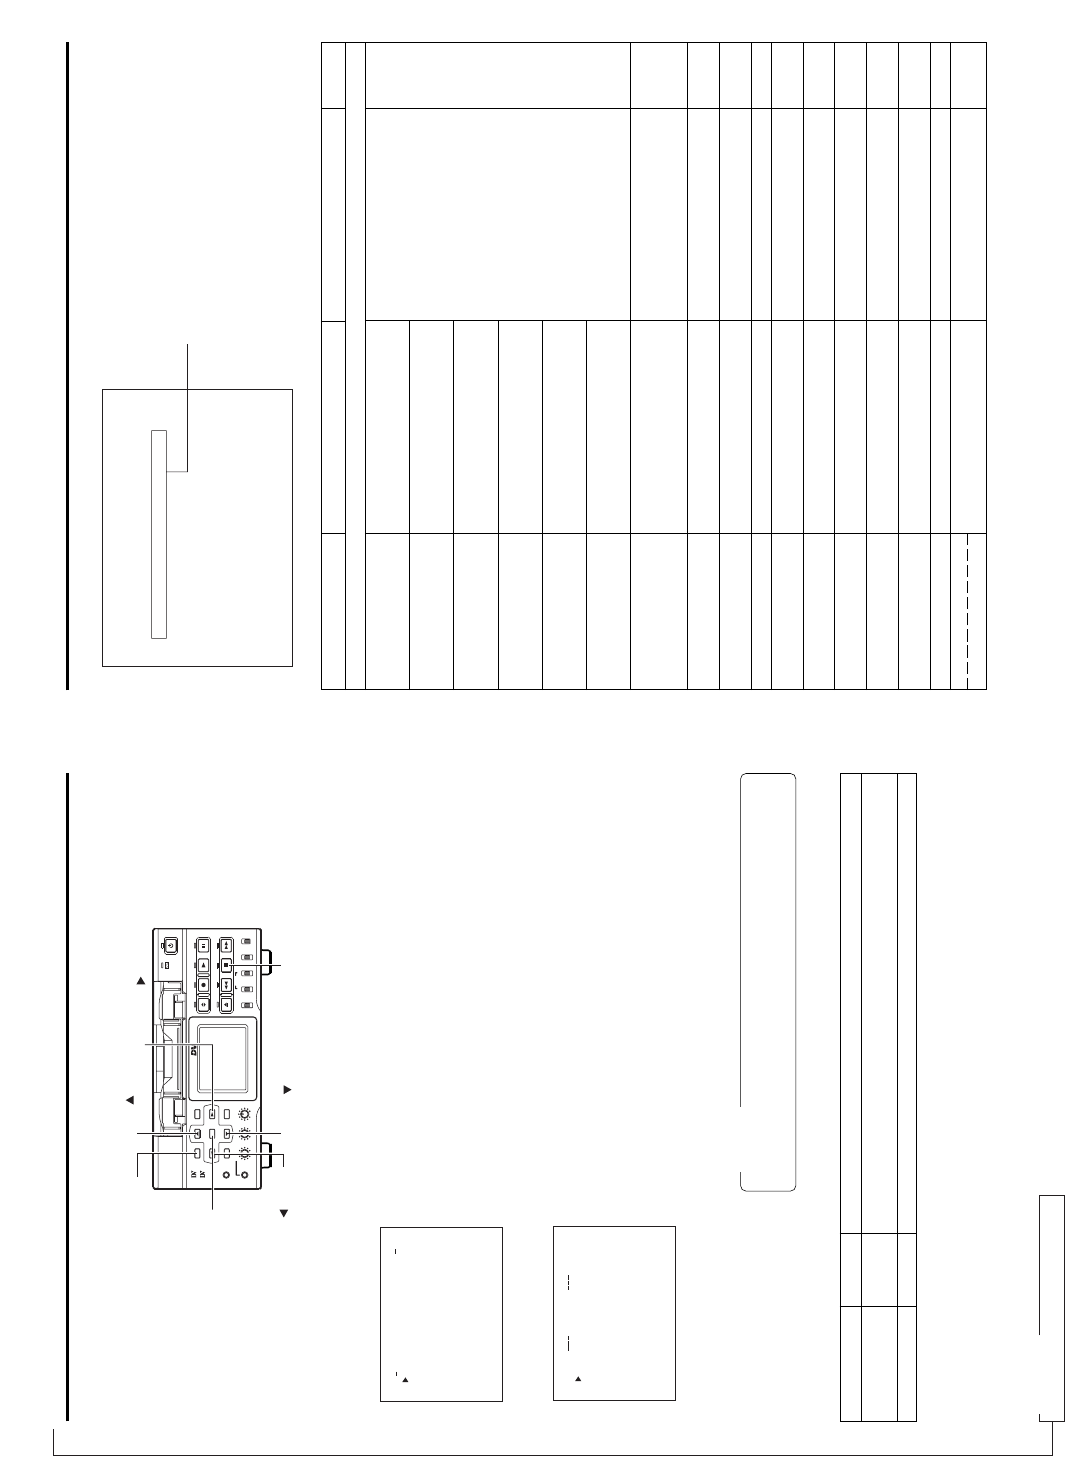
NETWORK PACK CONFIG menu screen
UPDATE menu screen
NET WORK
..
..
ORTWENKACK
P
ON
C
IG
F
ENCODE SET
MPEG REC
T
RGI
MOV I E
C
LI
PS
ET
PU
PU
S
T..SE PUMA NI
MENU R E E T CAN CEL
PAGE B
A
CK
8(WM F ew(C iV)undPer er)
UPDAT
E
..
TC 00:00: 000.0
SOFTWAR
VXX-XX
2003 XX XX XX.
:
X:XXX
INSER
T
A
D
N
.
FCCAR
CANCEL
UPDATE
UPDATE
UPDATE
PAGE BACK
E
TC 00:00: 000.0
1.
Insert a CF memory card with update data into the slot.
2.
Turn on the BR-DV6000 power.
3.
Press the MENU button to display the TOP MENU screen.
4.
Set the cursor to NETWORK PACK CONFIG and press the SET button while
holding the STOP button of the VTR.
● The NETWORK PACK CONFIG menu screen added with the UPDATE item
appears.
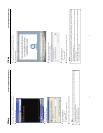
5.
Press the DISP (6) or BLANK (7) button, set the cursor to UPDATE and press
the SET button or SEARCH+(t) button.
● The UPDATE menu screen appears.
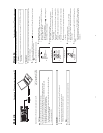
6.
Set the cursor to SOFTWARE UPDATE and press the SET button.
● CANCEL display will flash and changes will be allowed.
7.
Using the DISP (6) or BLANK (7) button, set the display to EXECUTE and press
the SET button.
● Update will begin and “UPDATE..” will flash on the screen during the process.
8.
When update is completed, the normal screen appears.
Caution
During update, do not turn the power off or perform menu or VTR operations. Mal-
function may occur as a result.
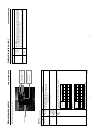
\ UPDATE menu screen contents ⅷ indicates default settings.
Item
NETWORK UPDATE
PAGE BACK
Setting
ⅷCANCEL
EXECUTE
Description
Set EXECUTE and press the SET button to start update.
Press the SET button to return to the NETWORK PAC CONFIG menu screen.
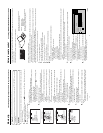
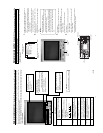
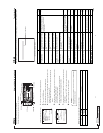
BR-DV6000
PROFESSIONAL
MENU RESET
A.DUB
EJECT
COUNTER
AUDIO INPUT
SELECT
MONITOR OUTPUT REMOTE
LOCAL
CTL L
MIX
R
CH-1/2
MIX
CH-3/4
DV
LINE
Y/C
(CPN)
TC
UB
REW STOP FF
REC
OPERATE
PLAY PAUSE
DISP
SET SEARCH+
BLANK CUE UP
HOLD
PHONES REC LEVEL
CH-1/3 CH-2/4
MIC
SEARCH–
Mini
MENU button
SET button
SEARCH- ( ) button
DISP ( ) button
BLANK ( ) button
SEARCH+ ( ) button
STOP button
65
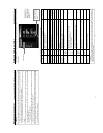
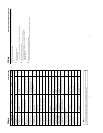
Remedy
Stop recording and replace with a new
CF memory card, or delete files on the
current CF memory card to secure
recording space.
Check the CF memory card and format
again. If the card still cannot be format-
ted, contact your nearest JVC-authorized
service agent.
Check the CF memory card and format.
Set the OUT POINT at least 5 seconds
from IN POINT.
Wait until the display disappears.
Check the FTP CLIENT SETUP setting
or the used network environment.
Cause
Remaining time became less than 60
seconds during recording to CF memory
card.
Remaining time became less than 30
seconds during recording to CF memory
card.
Remaining time became less than 20
seconds during recording to CF memory
card.
Remaining time became less than 10
seconds during recording to CF memory
card.
Remaining time has run out during
recording to CF memory card.
Recording is being attempted on CF
memory card with remaining time of less
than 10 seconds.
Failed to format CF memory card.
CF memory card is unformatted, or an
unknown format is being used.
Attempted to set the same value for IN
POINT and OUT POINT.
IN POINT has not been set.
Both IN POINT and OUT POINT have
not been set.
STOP button was pressed during
capturing.
Clips on the CF card are being trans-
ferred to a server.
File to transfer has not been selected.
File transfer was unsuccessful.
Operation was canceled.
Specified range of the DV tape is being
recorded.
Screen display
<File system related>
CF REMAIN 60SEC!
(Flashing for 3 sec.)
CF REMAIN 30SEC!
CF REMAIN 20SEC!
CF REMAIN 10SEC!
CF FULL!
(Displayed until CF recording
stops)
CF FULL!
(Flashing for 3 sec.)
FORMAT ERROR!
NO CF FORMAT!
(Flashing)
TIME CODE ERROR!
IN POINT NOT SET!
IN/OUT POINT NOT SET!
CAPTURE STOP!
WAIT A MINUTE, PLEASE!
FILE NO REGISTRATION!
FILE SEND ERROR!!
ACTION ESCAPE!!
CUE UP
REC
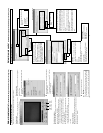
Others Troubleshooting
When there is a system error, network error, unit malfunction, etc., SA-DV6000 displays the error on the BR-DV6000 LCD screen.
Warning display
<LCD screen or viewfinder screen>
→
OVER
Reference
page
33
32
32
36
36
36
45
46
46
45
46
36
36
For Servicing
Refer to Service Manual "1.3 UPDATE"