4.1. Toner Kit Replacement
4-3
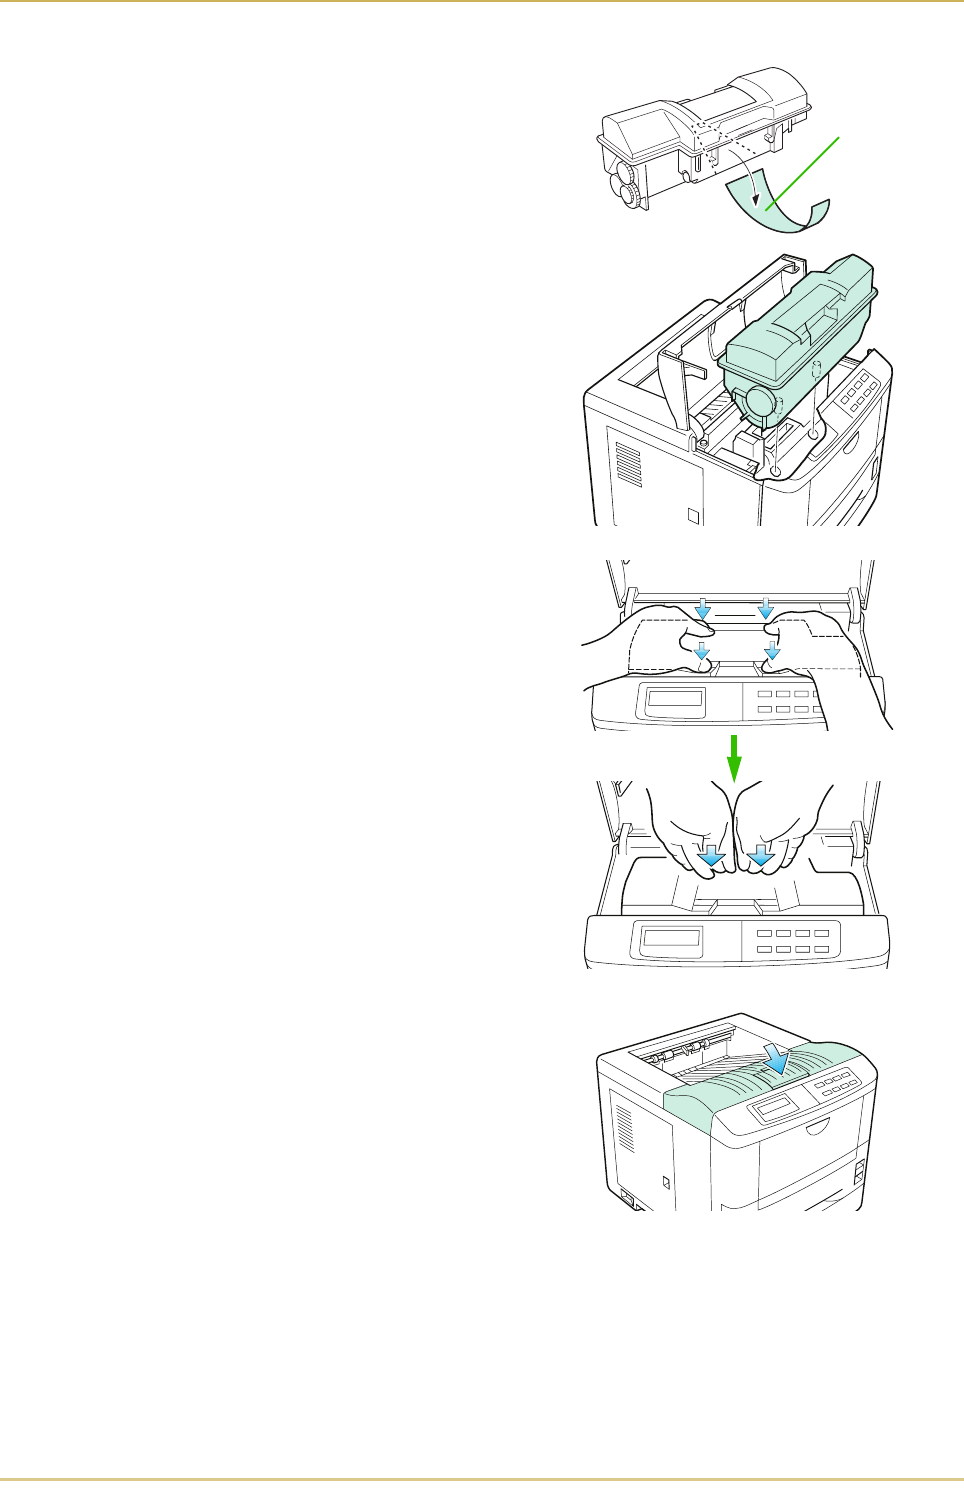
5. The bottom of the toner container is sealed with
a plastic strip. Carefully pull the sealing strip off
the toner container, making sure not to leak any
toner. Dispose of the sealing strip.
6. Install the toner container on the developer as
shown in the diagram.
☛ Be sure to peel off the seal on the toner
container before mounting the toner
container on the developer unit.
7. When the toner container is installed correctly
on the developer.
8. Push the top of the toner container unit ("PUSH
HERE") until it locks in.
☛ Make sure that the toner container is
properly locked in the printer.
9. Close the top cover by pressing the arrowed part
in this diagram.
☛ It is necessary to clean the inside of the
printer after replacing the toner con-
tainer.
If the toner container is replaced when the message
is displayed, the message
! will be displayed after replacement. After cleaning the inside of the
printer (See Section 4.2. Cleaning), the message will disappear when the CONTINUE
key is pressed, and the printer will be ready for printing.
Sealing Strip


