


If you have other devices to install or remove, do so now. Otherwise, go to
“Completing the installation” on page 233.
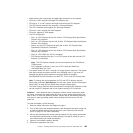
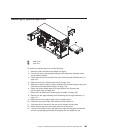
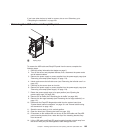
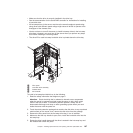
Removing the USB cable and EasyLED panel
1 Spring clips
To remove the USB cable and EasyLED panel from the server, complete the
following steps:
1. Read the safety information that begins on page 5.
2. Turn off the server and peripheral devices; then, disconnect the power cords
and all external cables.
3. Remove the power supply or power supplies from the power-supply cage (see
“Removing a hot-swap power supply” on page 174).
4. Unlock and remove the left-side cover (see “Removing the left-side cover” on
page 157).
5. Carefully lay the server down on its side.
6. Remove the power supply or power supplies from the power-supply cage (see
“Removing a hot-swap power supply” on page 174).
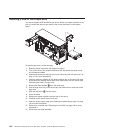
7. Rotate the power-supply cage to its open position (see “Opening the
power-supply cage” on page 158).
8. Remove the air baffle (see “Removing the air baffle” on page 169).
9. Remove the fan-cage assembly (see “Removing the fan-cage assembly” on
page 171).
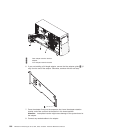
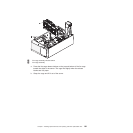
10. Disconnect the EasyLED diagnostics cable from the system board (see
“System-board internal connectors” on page 131 and “Internal cable routing
and connectors” on page 163).
11. Stand the server back up in its vertical position.
12. Open the bezel (see “Opening the bezel” on page 150).
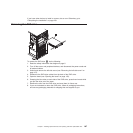
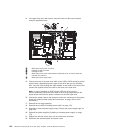
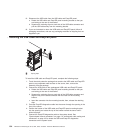
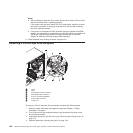
13. Press down on the release latch on the top of the USB cable and EasyLED
panel mounting bracket; then, rotate the top of the mounting bracket away
from the server.
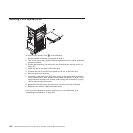
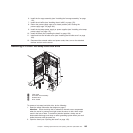
14. Lift the USB cable and EasyLED panel mounting bracket out and away from
the server while you pull the diagnostics cable through the hole.
Chapter 7. Installing optional devices and replacing customer replaceable units 193
|