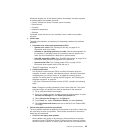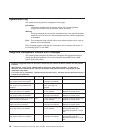
v Follow the suggested actions in the order in which they are listed in the Action column until the problem
is solved.
v See Chapter 8, “Parts Listing, TD200x Machine Types 3719, 3821, 3822, and 3823,” on page 237 to
determine which components are customer replaceable units (CRU) and which components are field
replaceable units (FRU).
v If an action step is preceded by “(Trained service technician only),” that step must be performed only by a
trained service technician.
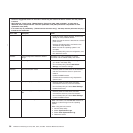
Error code Description Action
0011002 Microprocessor mismatch
1. Run the Setup utility and view the microprocessor
information to compare the installed
microprocessor specifications.
2. (Trained service technician only) Remove and
replace one of the microprocessors so that they
both match.
0011004 Microprocessor failed BIST
1. Update the firmware (see “Updating the firmware”
on page 267).
2. (Trained service technician only) Reseat
microprocessor 2.
3. Replace the following components one at a time,
in the order shown, restarting the server each
time:
a. (Trained service technician only)
Microprocessor
b. (Trained service technician only) System
board
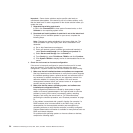
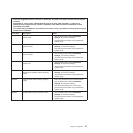
001100A Microcode update failed
1. Update the server firmware (see “Updating the
firmware” on page 267).
2. (Trained service technician only) Replace the
microprocessor.
0050001 DIMM disabled
1. If the server fails the POST memory test, reseat
the DIMMs.
2. Remove and replace any DIMM for which the
associated error LED is lit (see “Removing a
memory module” on page 210 and “Installing a
memory module” on page 211).
3. Run the Setup utility to enable all the DIMMs.
4. Run the DSA memory test.
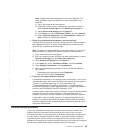
0051003 Uncorrectable DIMM error
1. If the server failed the POST memory test, reseat
the DIMMs.
2. Remove and replace any DIMM for which the
associated error LED is lit (see “Removing a
memory module” on page 210 and “Installing a
memory module” on page 211).
3. Run the Setup utility to enable all the DIMMs.
4. Run the DSA memory test.
0051006 DIMM mismatch detected Make sure that the DIMMs match and are installed in
the correct sequence (see “Installing a memory
module” on page 211).
Chapter 5. Diagnostics 31


