


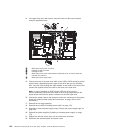
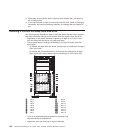

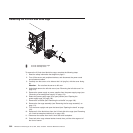
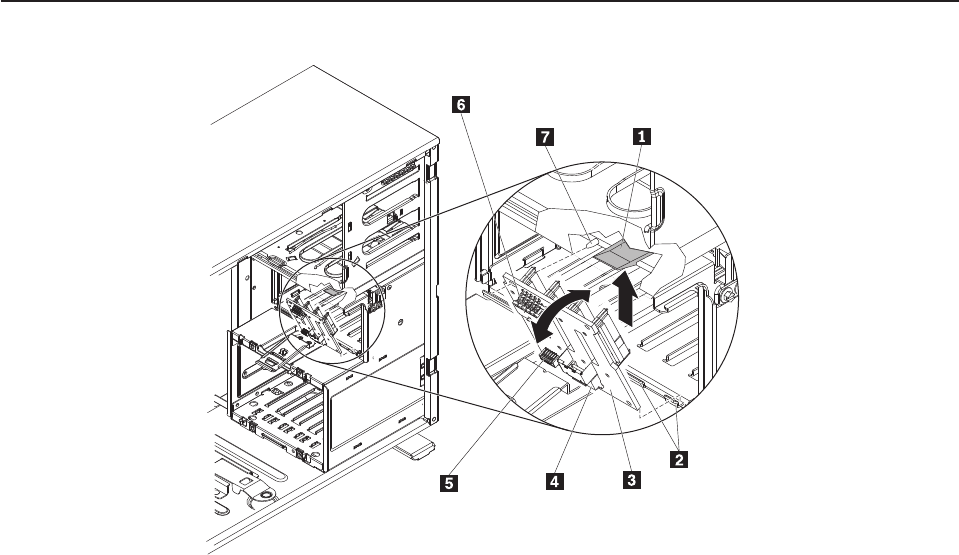
Installing a 2.5-inch disk drive backplane
1 Latch
2 Tabs
3 Configuration cable connector
4 SAS signal cable connector
5 2.5-inch hot-swap backplane
6 Power cable connector
7 Locator pin
To install a 2.5-inch hard disk drive backplane, complete the following steps:
1. Touch the static-protective package that contains the hard disk drive backplane
to any unpainted metal surface on the server; then, remove the backplane
from the package.
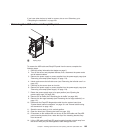
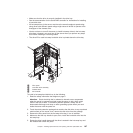
2. Position the 2.5-inch hard disk drive backplane in the drive-cage retention tabs;
then, rotate the top of the backplane toward the locator pins until the latch
clicks into place
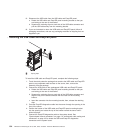
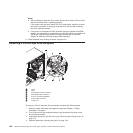
3. Connect the power, signal, and configuration cables to the 2.5-inch hard disk
drive backplane (see “2.5-inch hard disk drive backplane connectors” on page
147 and “Internal cable routing and connectors” on page 163).
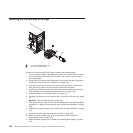
4. If you are replacing another 2.5-inch hard disk drive backplane, repeat steps 1
through 3 to install the additional backplane.
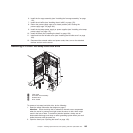
5. Install the hot-swap hard disk drives (see “Installing a 2.5-inch hot-swap hard
disk drive” on page 196).
6. Close the bezel (see “Closing the bezel” on page 151).
7. Install the fan-cage assembly (see “Installing the fan-cage assembly” on page
172).
8. Install the air baffle (see “Installing the air baffle” on page 170).
9. Return the power-supply cage to its closed position (see “Closing the
power-supply cage” on page 160).
200 ThinkServer TD200x Types 3719, 3821, 3822, and 3823: Hardware Maintenance Manual