


Macintosh
22
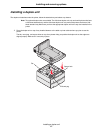
Installing drivers for network printing
Configuring Drag‘N’Print
Note: Drag’N’Print™ support is not available for all printers.
For detailed configuration instructions, launch the drivers CD, click View Documentation, and click Software and utilities.
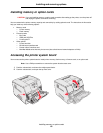
Macintosh
Note: A PostScript Printer Description (PPD) file provides detailed information about the capabilities of a
printer to UNIX or Macintosh computers.
To print to a network printer, each Macintosh user must install a custom PostScript Printer Description (PPD) file, and either
create a desktop printer on the computer (Mac OS 9.x) or create a print queue in Print Center (Mac OS X).
Mac OS X
Step 1: Install a custom PPD file
1 Install a PostScript Printer Description (PPD) file on the computer.
a Insert the drivers CD.
b Double-click the installer package for the printer.
Note: A PPD file provides detailed information about the capabilities of a printer to the Macintosh computer.
c Click Continue on the Welcome screen and again after viewing the Readme file.
d Click Continue after viewing the license agreement, and click Agree to accept the terms of the agreement.
e Select a Destination, and click Continue.
f On the Easy Install screen, click Install.
g Enter the password, and click OK. All the necessary software is installed on the computer.
h Click Close when installation is complete.
Step 2: Create a print queue in Print Center or Printer Setup Utility
Using AppleTalk Printing
Follow these steps to create a print queue using AppleTalk Printing.
1 Open Finder, click Applications, and click Utilities.
2 Double-click Print Center or Printer Setup Utility.
3 Choose Add Printer from the “Printers” menu.
4 Choose AppleTalk from the pop-up menu.
Note: Look on the network setup page under the “AppleTalk” heading to know which zone or printer to
select.
5 Select the AppleTalk zone from the list.
6 Select the new printer from the list, and click Add.