


Macintosh
23
Installing drivers for network printing
7 Verify printer installation:
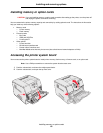
a Open Finder, click Applications, and click TextEdit.
b Choose Print from the “File” menu.
c Choose Summary from the “Copies & Pages” pop-up menu.
Note: To know which zone or printer to select, look on the Network Setup page under the “AppleTalk”
heading to find the default name of the printer.
• If the PPD file displayed in the Summary window is correct for the printer, then printer setup is complete.
• If the PPD file displayed in the Summary window is not correct for the printer, delete the printer from the
printer list in Print Center or Printer Setup Utility, and repeat Step 1: Install a custom PPD file.
Using IP Printing
Follow these steps to create a print queue using IP Printing. To create an AppleTalk print queue, see Step 2: Create a print
queue in Print Center or Printer Setup Utility.
1 Open Finder, click Applications, and click Utilities.
2 Double-click Print Center or Printer Setup Utility.
3 Choose Add Printer from the “Printers” menu.
4 Choose IP Printing from the pop-up menu.
5 Enter the IP address or the printer DNS name in the Printer Address box.
6 Choose Lexmark from the “Printer Model” pop-up menu.
7 Select the new printer from the list, and click Add.
8 Verify printer installation:
a Open Finder, click Applications, and click Text Edit.
b Choose Print from the “File” menu.
c Choose Summary from the “Copies & Pages” pop-up menu.
d Do one of the following:
• If the PPD file displayed in the Summary window is correct for the printer, then printer setup is complete.
• If the PPD file displayed in the Summary window is not correct for the printer, delete the printer from the
printer list in Print Center or Printer Setup Utility, and repeat Step 1: Install a custom PPD file.
Mac OS 9.x
Step 1: Install a custom PPD file
1 Insert the drivers CD.
a Double-click Classic, and double-click the installer package for the printer.
Note: A PPD file provides detailed information about the capabilities of a printer to the Macintosh computer.
b Choose the appropriate language, and click Continue.
c Click Continue after viewing the Readme file.
d Click Continue after viewing the license agreement, and click Agree to accept the terms of the agreement.
e On the Easy Install screen, click Install. All the necessary files are installed on the computer.