


24
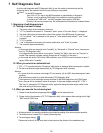
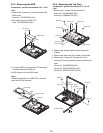
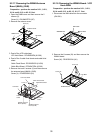
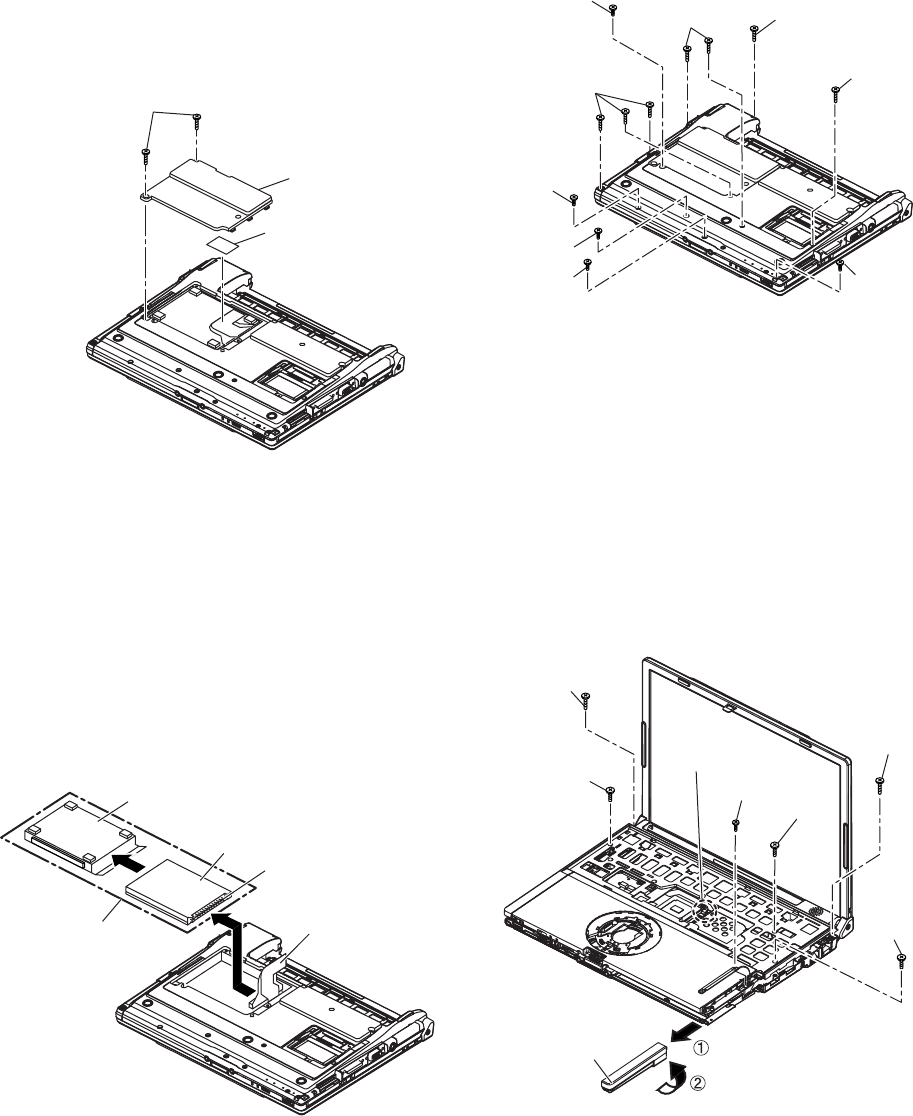
9.2.4. Removing the Top Case
Preparation : perform the section 9.2.1.,9.2.2.
first.
1. Remove the 7 screws (D) and screws (E).
Screw (D) : DXHM0039ZA (N5)
Screw (E) : DXHM0057ZA (N7)
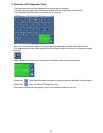
2. Remove the speaker cable from the connector
(CN26).
3. Remove the side cover (R) as slide it to this side.
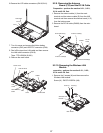
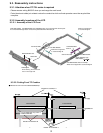
4. Remove the 1 screw (F), 3 screws (G) and 2
screws (H) from top case and then remove the top
case.
Screw (F) : DXHM0056ZA (N6)
Screw (G) : DXQT2+E6FNL (N12)
Screw (H) : DXQT26+D8FCL (N14)
Screw (E)
Screw (E)
Screw (D)
Screw (D)
Screw (D)
Screw (D)
Screw (E)
Screw (E)
Screw (E)
Screw(L)
Screw(L)
Screw(K)
Screw(K)
Screw(J)
Screw(K)
Side Cover(R)
CN26
Speaker Cable
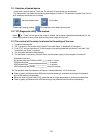
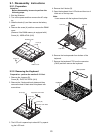
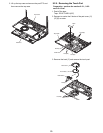
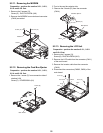
9.2.3. Removing the HDD
Preparation : perform the section 9.2.1., 9.2.2.
first.
1. Remove the 2 screws (C) and then remove the
HDD cover.
Screw (C) : DFHE5025XA (N1)
2. Peel off the tape from HDD FPC.
Tape : TPD-X0033A (S1001)
Screw (C)
Tape
HDD Cover
HDD
HDD FFC
FFC Connector
HDD Unit
HDD Case
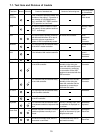
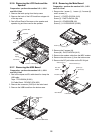
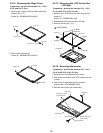
3. Lift up the HDD unit and remove FFCconnector
and then remove the HDD unit.
4. HDD is taken out of the HDD case.
Note :
Please don't bend pins of HDD FPC connector
when the HDD is removed.