


4-11
Professional Way to Make Color Copies Chapter 4
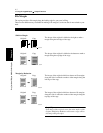
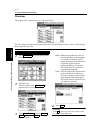
2. Color Adjust Mode (Professional)
These pages explain how to professionally adjust the hue or tone of the color produced on the copy.
When you touch on the Touch Panel, a screen appears that allows you to adjust these
features.
For copy samples, see the “Creative Image Book” separately provided.
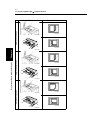
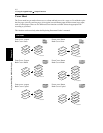
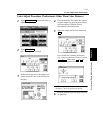
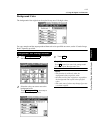
Professional Adjustment Items
You can select one of seven samples, each having
a specific hue level, to obtain the best possible hue
on the copy. You can further fine-tune the hue
level over 19 steps.
You can select one of seven samples, each having
a specific saturation level, to obtain the best
possible saturation on the copy. You can further
fine-tune the saturation level over 19 steps.
You can select one of seven samples, each having
a specific brightness level, to obtain the best
possible brightness on the copy. You can further
fine-tune the brightness level over 19 steps.
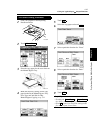
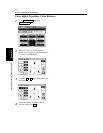
You can select one of seven samples, each having
a specific sharpness level, to obtain the best
possible sharpness on the copy.
You can select one of seven samples, each having
a specific contrast level, to obtain the best possible
contrast on the copy. You can further fine-tune the
contrast level over 19 steps.
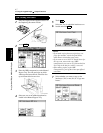
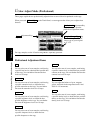
You can adjust the balance of cyan, magenta,
yellow, and black in the range between 0% and
200% in 1% increments.
You can select one of seven samples, each having
a specific density level, to obtain the best possible
density on the copy. You can further fine-tune the
density level over 19 steps.
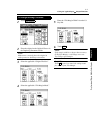
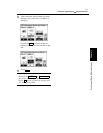
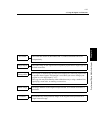
Color Adjust
1154P188CA
Adjustment Keys
☞ p. 3-30
Basic
Adjustment Key
Touch this key to open the
professional adjustment menu.
Professional
Key
Touch this key to select the
image type of your original.
☞ p. 3-32
Original Image Type
Hue
Saturation
Brightness
Sharpness
Contrast
Color Balance
Density