User’s Guide 29
English
Put the drum cartridges where they will not be scratched
and not exposed to strong light.
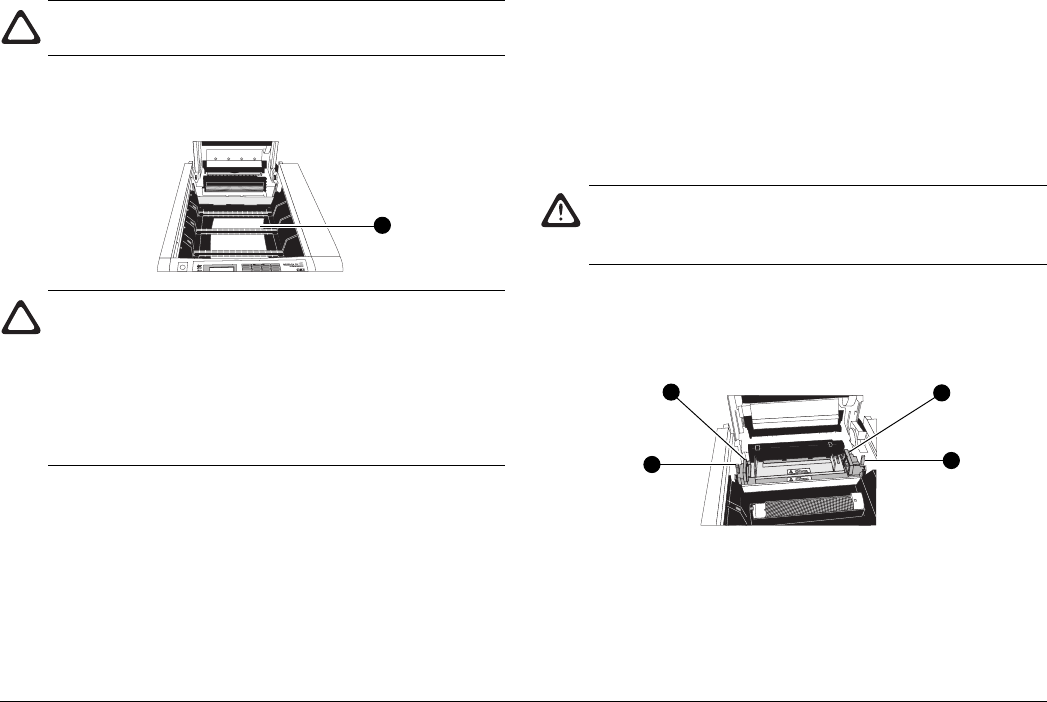
3. Inspect the paper path for sheets of paper. Carefully remove
any sheets (2) you find.
Paper jammed under the first image drum should be pulled
forwards through the paper path if possible, not backwards,
to avoid spillage of unfused toner into the paper input
area.
Be especially careful not to scratch the transfer belt. Avoid
using sharp instruments.
4. Lower each image drum cartridge back into position via its
two locating slots at each side of the printer, being careful
to match the coloured label on each cartridge with its
corresponding coloured label in the printer.
5. Close the top cover and press down firmly at both sides to
ensure that it is locked down.
Clearing a Paper Exit Jam
An indicated paper exit jam means paper has jammed in the
fuser or between the fuser and the point of exit from the printer.
1. Press the OPEN button and raise the top cover to its fully
upright position.
When accessing the central area take care not to touch
the hot surfaces around the fuser. These are clearly
marked with yellow warning labels, and are very hot.
2. Push the two coloured fuser latch levers (1) away from you
(towards the rear of the printer).
3. Lift the fuser by its two handles (2) straight up and out of
the printer.
2
1
2
2
1


