User’s Guide 35
English
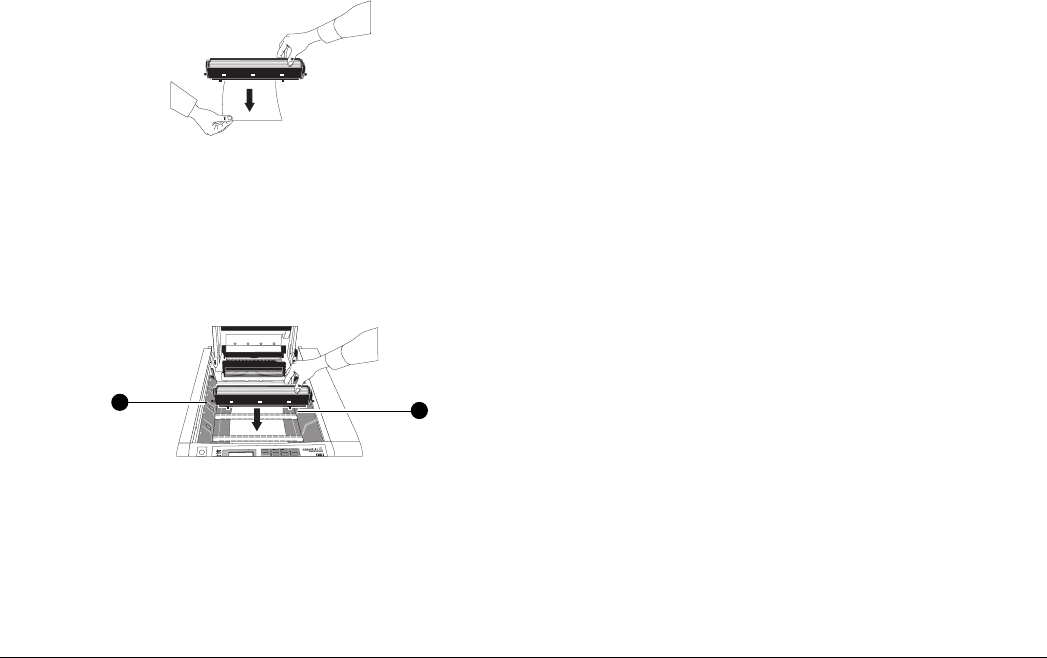
5. Unpack the new drum cartridge and pull out the protective
sheet of paper.
Pull the sheet straight downwards to avoid tearing.
6. Hold the new cartridge above its intended position and lower
it gently all the way in.
Locating slots (1) at each side of the printer help you to
correctly position the drum cartridge.
7. Remove any plastic foam seal from the top of the new drum
cartridge.
8. Install a new toner cartridge of the appropriate colour,
following the instructions given in the previous section.
Resetting Drum Count
After installing a new image drum the page counter for that drum
should be reset. This is performed using the User Menu.
1. Hold down the MENU 1 / Menu 2 key for about 2 seconds
until the menu item COLOR REG ADJUST appears in the
display.
2. Press and release the MENU 1 / Menu 2 key to cycle
through the available items. When the display shows
ENGINE CNT RESET, press ENTER.
3. Press and release the MENU 1 / Menu 2 key to cycle
through the available items. When the display shows
CCCCC DRMCNT (“CCCCC” means the colour of the
replaced drum), press the ENTER key to reset the drum
count.
4. If you have changed two or more drums at the same time,
also reset their counts.
5. Press the ON LINE key to exit from the User Menu and
return to the ON LINE (ready) condition.
1
1
