6
Control reference guide
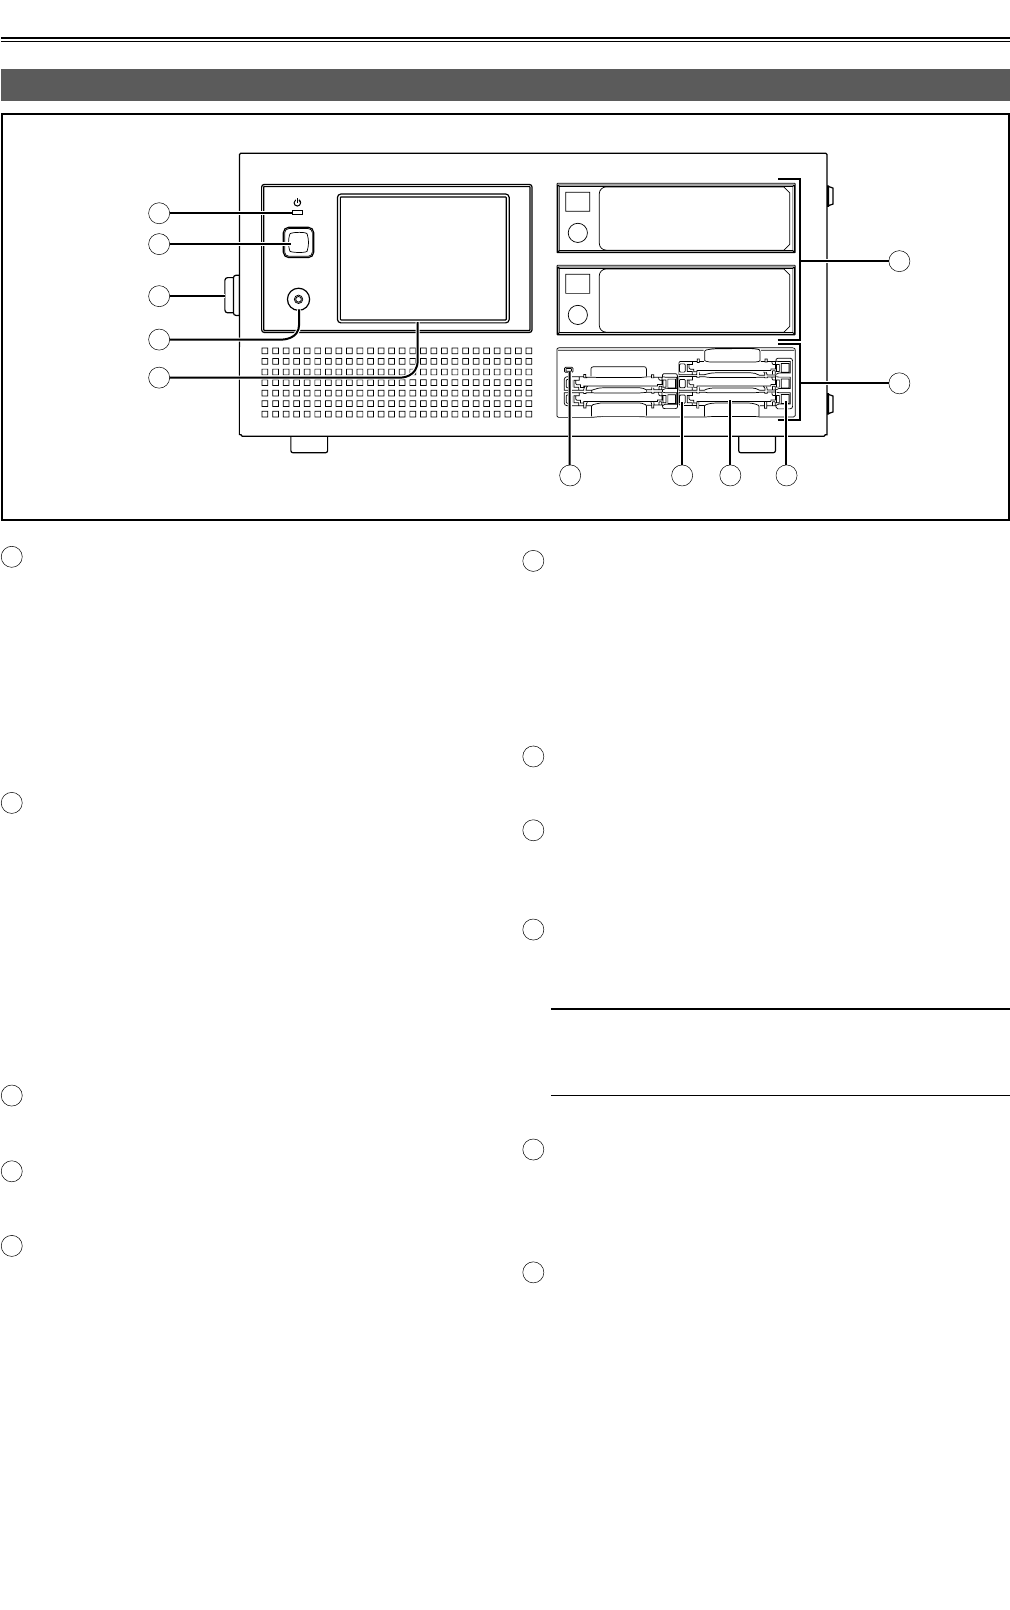
A
Front POWER LED
Lights when the unit is ON.
When the LED goes off and the rear POWER
switch is ON, electric power is still consumed.
Always turn the rear POWER switch OFF when the
battery is not used.
When an external DC power supply is used,
standby power will continue to be consumed so set
the rear POWER switch to OFF.
B
Front POWER button
This button is used to start up the unit and shut it
down.
When it is at the OFF setting:
The unit starts up when the front POWER
button is pressed.
When it is at the ON setting:
The unit shuts down automatically when the
front POWER button is pressed. After the unit
has shut down, set the rear POWER switch to
OFF.
C
Grips
This is the handle for carrying the unit.
D
HEADPHONES jack
Use mini-jack HEADPHONE.
E
LCD panel with touch panel
All the operations are done on the touch panel
except power ON and OFF.
Front Panel
HEADPHONES
HDD1
HDD2
A
F
B
C
G
D
E
H IJ K
F
5-inch bay units used to install the HDD
You can install the HDD (SATA) which you
purchased with the 5 inch bay unit.
For details on the installation method and the
HDDs which can be used, refer to the procedure
described separately, and proceed with the
installation. (page 9)
G
P2 Drive
The P2 drive has been installed.
H
Power Indicator
This indicator lights up in green when the P2 drive
is running.
I
Status Indicator
This indicator blinks in green during access to a P2
card.
Do not remove the P2 card during access of the
card, otherwise files may be corrupted, or the P2
card may fail.
J
Card Slots
The P2 drive’s card slots are designed for P2 cards.
The P2 drive does not operate with cards other
than P2 cards.
K
EJECT Button
To remove a P2 card, press this button so that the
button pops out, then press it in again.


