


<DRB1239>
20
NetWare (NCP)
This section outlines the required configuration settings
for running the Network Cache Changer DRM-6NX in
the Novell NetWare environment. The section also
outlines how to set up access restrictions.
If you intend to use the DRM-6NX in a multi-protocol
environment, proceed to the other relevant sections in
this manual:
÷ pp. 18 – 19 - Microsoft and IBM Networks (SMB)
÷ pp. 25 – 26 - UNIX (NFS)
÷ pp. 27 – 28 - Web browser (HTTP)
NOTES:
7
When installing the first DRM-6NX in your NDS tree, the DRM-
6NX will try to extend the NDS Schema with a new attribute to the
“NCP server” class. The extension is needed for storing the DRM-
6NX's file system rights, (i.e. access rights to the discs and the
system files). The new attribute is called “PIONEER:SPcd:rights”.
This new attribute will not affect the operation of your NetWare
servers. The schema extension has been approved by Novell.
7
Adding the schema extension requires Supervisor rights to the
[Root] object of the NDS Directory tree. This means that the user
in the NDS Admin Name parameter must have Supervisor
access rights.
7
If schema extensions are not allowed in your NDS tree, you can
store the access rights in a file on a Novell file server. In this case,
you do not need Supervisor access rights. However, you must
specify the NDS Rights Storage and NDS Rights File parameters
properly. After the NDS installation, you should also create and
assign access rights to a directory on the Novell file server.
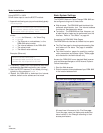
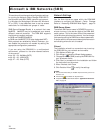
Wizard
The installation wizard is a convenient way to set up
the DRM-6NX for your network environments.
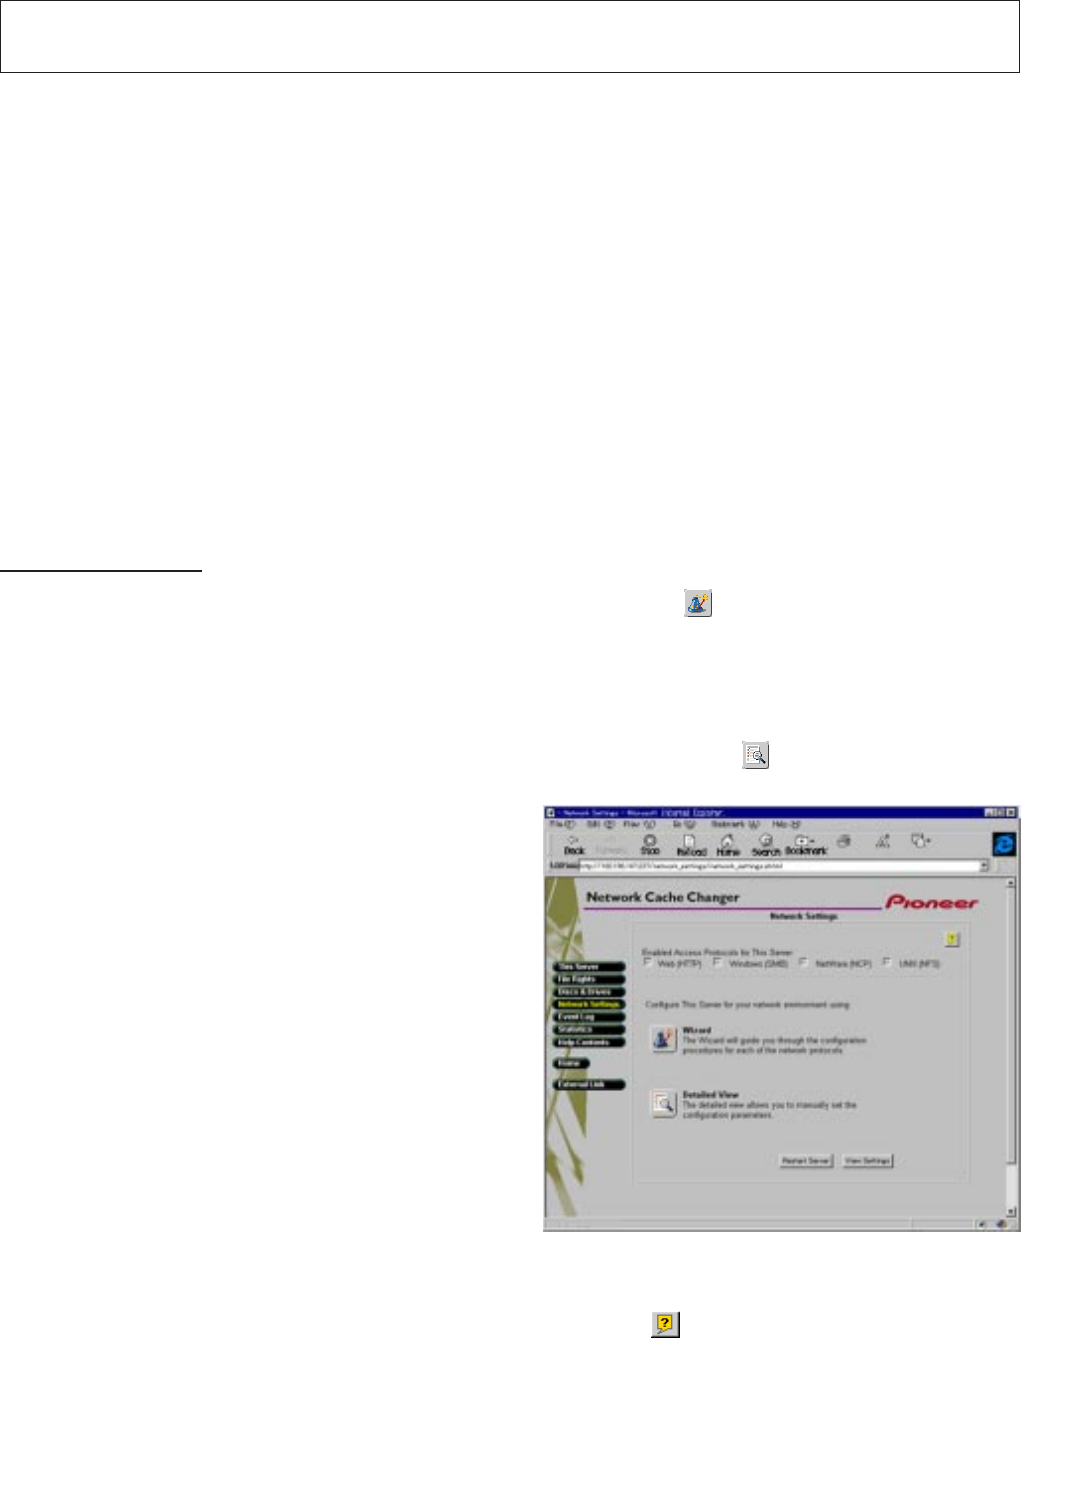
1.Click Network Settings
2.Click Wizard and the Wizard dialog appears
3.Choose NetWare (NCP) to set up the DRM-6NX for
your NetWare clients
4. Click Start to proceed with the installation and follow
the instructions on the screen
5.When finished, click Close
6.Click Detailed View to verify the settings and edit
the configuration parameters
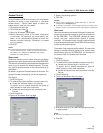
Network Settings
The DRM-6NX emulates both a NetWare 3.x bindery
server and a 4.x NDS server. It supports NetWare
over the IP protocol. Clients that support the NetWare/
IP protocol will connect directly to the DRM-6NX, (i.e.
peer-to-peer). Clients without NetWare/IP support will
be routed through a Novell server with an IPX/IP gateway.
If your network supports TCP/IP, use the Administration
pages within the DRM-6NX web interface to configure
the DRM-6NX. Refer to “
Accessing the DRM-6NX Web
Pages
” on page 16.
NetWare Server Name
The default NetWare server name is
PIONNER<nnnnnn>_NW, where <nnnnnn> is the last
six digits of the DRM-6NX serial number. This is the
name that will be presented to the NetWare clients on
the network. You can change that name by editing the
NetWare Server Name parameter. It can be useful to
choose a more descriptive name, such as indicating the
location of the unit.
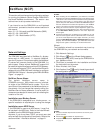
Installation as a Bindery Server
If the DRM-6NX is designated as a bindery server, no
specific installation is required prior to using the changer.
Installation as an NDS Server
If the DRM-6NX is used as an NDS server, it must first
be installed in the NDS tree. Refer to the Install Wizard
available from the DRM-6NX web interface.
However, if you do not have TCP/IP, you must use a text
editor and edit the configuration file manually. Refer to the
section entitled “Alternative Method ” on page 21.
NOTES:
7
It is best to disable all protocols that will not be used for your
system interface
7
Online help is available for all parameters
7
The parameter list detailed in “Appendix A - Parameter List ”
on page 40