<DRB1239>
21
NetWare (NCP)
Alternative Method
Follow the steps below to install the DRM-6NX as an
NDS server:
1.Verify that the NDS tree is synchronized
Load
DSREPAIR
on the server in the NDS tree and select
Unattended full repair
If the NDS tree is not synchronized, do not continue
the installation until you have solved the problem
2.Use a standard text editor to edit the configuration
parameters DRM-6NX configuration file .
From Windows Explorer or File Manager, locate the
DRM-6NX configuration file entitle
d config.ini
from
PIONEER<nnnnnn>\System\Server Properties\config.ini,
(<nnnnnn>
are the last six digits of the serial number
)
3.Enter the appropriate settings for these parameters:
Parameter name Value Description
TimeSyncSources = SAP Default is
SAP
for the network
agreed time. Alternatively,
enter the chosen server names
to be contacted for time
synchronization.
Parameter name Value Description
[Server]
TimeZone = Must be set to the time zone
in which the DRM-6NX is
operating
TimeSyncSource = NDS Set to
NDS
to enable the unit
to match the time set on the
NetWare network.
The Default setting is NDS
[NetWare]
NDSEnable = yes Must be set to Yes to enable the
NDS login
NDSTreeName = The name of the tree where
you want to install the unit
e.g.
MEDCORP
NDSServerContext= The specific name of the
context in the NDS tree where
THE DRM-6NX changer is to
be installed
e.g. Manufacturing.Medtec
NDSAdminName = The specific name of a user
or administrator with
Supervisor or Create rights to
the context where you want to
install the DRM-6NX changer
e.g. Admin.Medtec
NDSAdminPassword
= The password of the
administrator entered in
NDSAdminName is shown
above. Once written, this
password will appear as
******
NDSInstall = install Changing to 'install' when you
are ready to install the changer
A 'forced install 'will overwrite
the existing server object with-
out warning.
NDSRightsStorage = NDS Set to
NDS
to store the access
rights in the NDS tree. Set to
File
to store the access rights in
on the Novell server.
NDSRightsFile = If storing the access rights in a
file on the Novell file server,
specify the whole path, e.g.
CORPSERVER/SYS:CDSERVER
/CDSRV.DAT
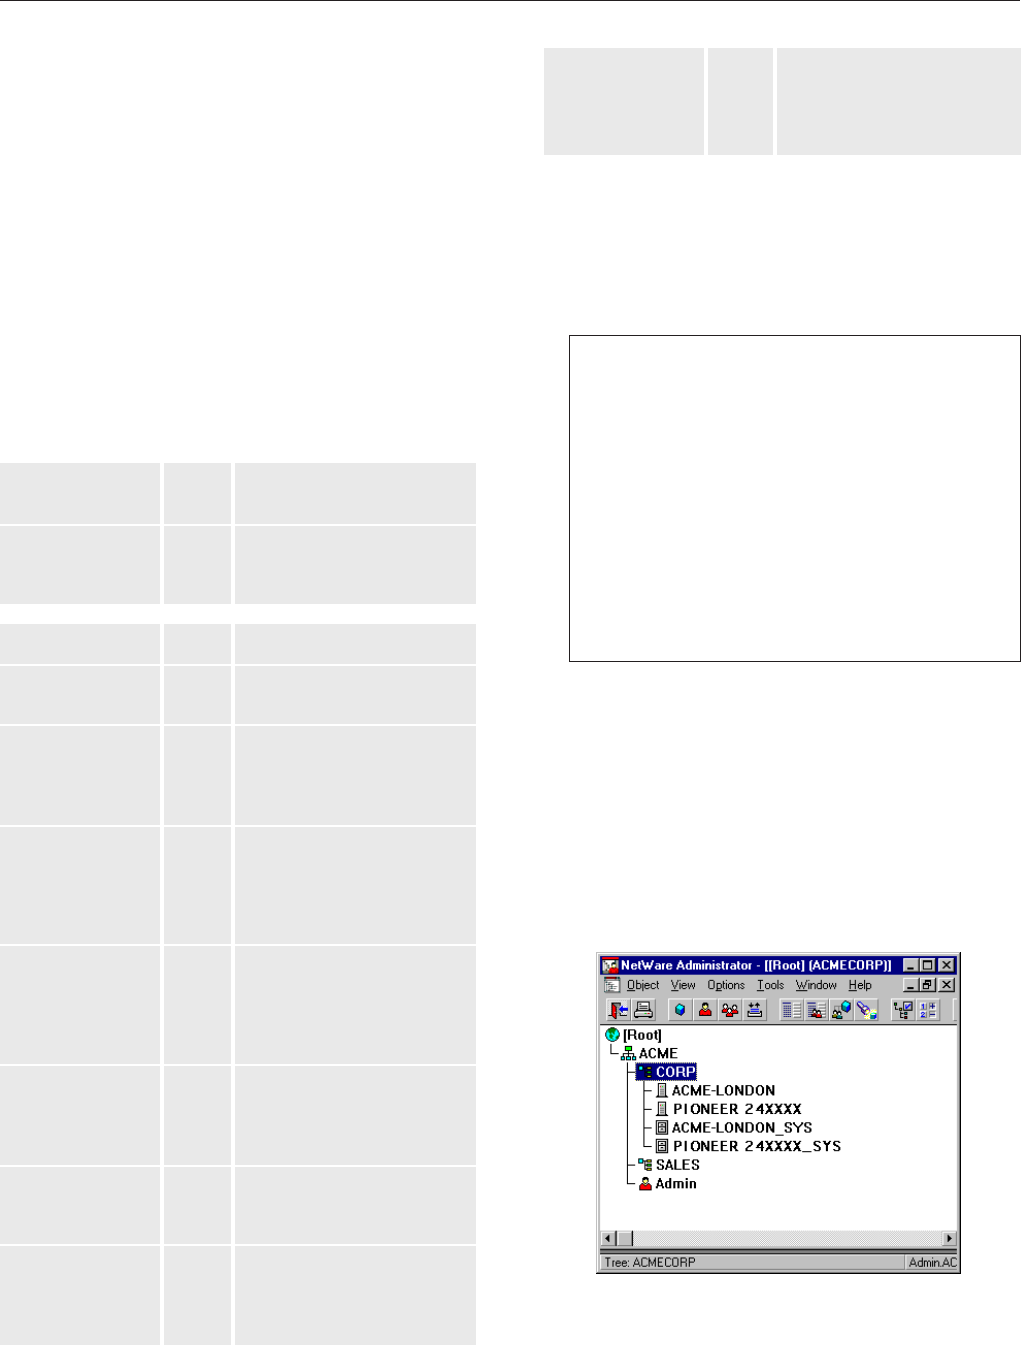
Example (NDS settings):
The DRM-6NX is placed in Eastern United States.
The name of your NDS tree is ACMECORP; the name
of the context where you wish to install the DRM-
6NX is Corp.Acme; the name of theadministrator
is Admin.Acme. Specify these parameters:
[Server]
TimeZone = US_CAN_Eastern
TimeSyncSource = NDS
. . .
[NetWare]
NDSEnable = yes
NDSTreeName = ACMECORP
NDSServerContext = Corp.Acme
NDSAdminName = Admin.Acme
NDSAdminPassword = secret
NDSInstall = install
NDSRightsStorage = NDS
TimeSyncSources = SAP
4.Save the
config.ini
file to start the NDS server
installation. The installation takes about 15 seconds
after which users are able to access the DRM-6NX
changer in NDS mode
5.After the installation you must log out then log in to
have all of the necessary rights on the DRM-6NX
server object and the associated volume.
Using the NWAdmin, you will find a new server object
and corresponding volume object in the context you
chose above
The DRM-6NX installed in the NDS Tree