3-- 5
Powerware 9330 (10 kV A--40 kVA) Installation and Operation
164201300 REV. G 061502
3.3.2 Installing Internal Batteries in the Battery Cabinet
If the battery cabinet was ordered without batteries, install the batteries in
accordance with the following procedure.
WARNING:
LETHALVOLTAGEWILLBEPRESENTWHENPERFORMINGTHESTEPSIN
THIS SECTION.
1. Ensure that battery breaker is in the OFF position. If not, set breaker to OFF
position.
2. Remove front vented panel from battery cabinet. The front panel is secured
with magnetic latches and is removed by pulling panel straight forward to
disengage magnetic latches.
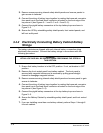
3. Remove screws securing internal safety shield panel and remove panel to gain
access to battery trays.
4. Remove battery trays, containing wiring and nylon straps, from the UPS
cabinet.
5. Select batteries in a accordance with paragraph 3.2. Use batteries of the same
age, type, and manufacturer, in each string, so UPS performance is not
affected.
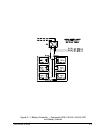
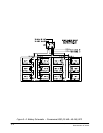
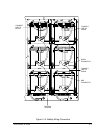
6. Install four batteries per tray and electrically interconnect the batteries in
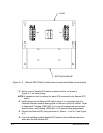
accordance with Figure 3---1.
7. Secure batteries to tray using nylon straps.
8. R einstall battery trays into the UPS cabinet.
9. Connect battery strings in accordance with paragraph 3.4.2.
3.4 Connecting Batteries
3.4.1 Electrically Connecting Integral Battery Strings
The UPS cabinet is shipped with each internal battery connection string electrically
disconnected. Connect the battery strings in accordance with the following
procedure:
WARNING:
LETHALVOLTAGEWILLBEPRESENTWHENPERFORMINGTHESTEPSIN
THIS SECTION.
1. Ensure that battery breaker CB2 is in the OFF position. If not, set breaker to
OFF position.
2. Remove left front solid panel and right front vented panel from Powerware 9330
(10 kVA---20 kVA) UPS or left front solid panel and front vented panels from
Powerware 9330 (25 kVA---40 kVA) UPS. F r ont panels are secured with
magnetic latches and are removed by pulling panel s straight forward to
disengage magnetic latches.


