


14
SET-UP AND OPERATION
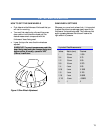
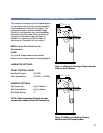
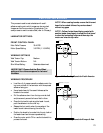
SETTING THE UNWIND BRAKE TENSION
IMPORTANT! The brake tension greatly
affects the smooth flow of the laminating film.
• Turning the unwind brake in a counter-clockwise
direction increases the braking tension applied on
the laminate.
• Turning the unwind brake in a clockwise direction
decreases the braking tension.
• The best setting for the unwind brake tension is
determined by the materials you are using and is
learned through experience.
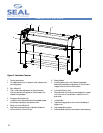
Figure 6. Unwind Brake
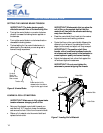
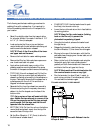
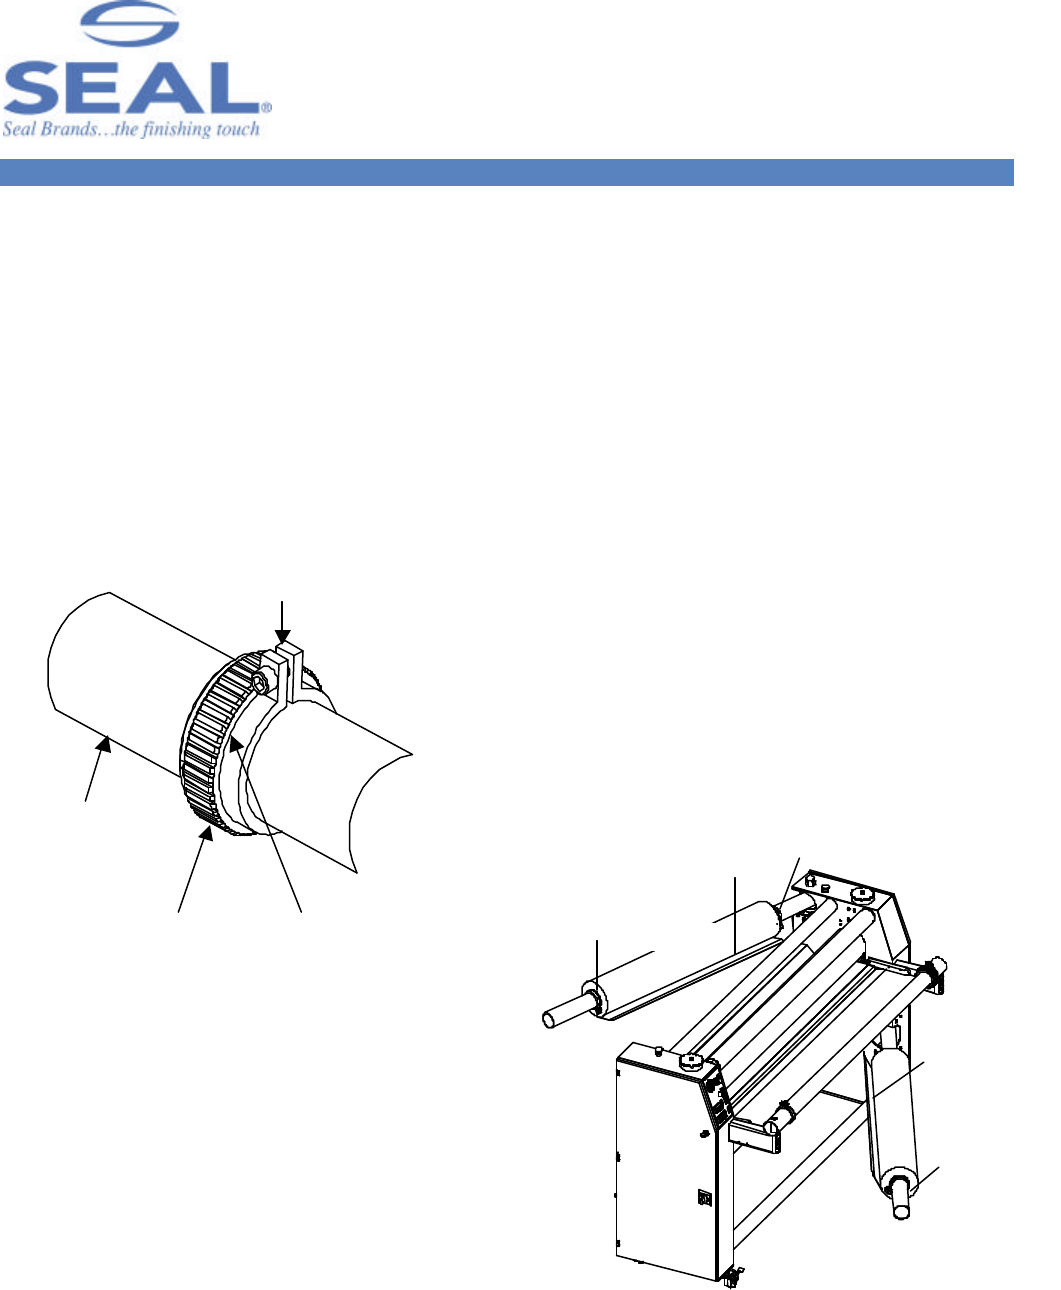
LOADING A ROLL OF MATERIAL
IMPORTANT! Make sure to fully release brake
tension whenever changing a roll of film.
• Swing out the desired unwind shaft towards you
and use the 5/16 T-handle to loosen the setscrew
and remove the Lock Collar from the unwind shaft.
• Slide a roll of material onto the unwind shaft and
replace the lock collar.
IMPORTANT! Make certain that you place the
roll of film on the unwind shaft so that the
material will feed with the adhesive side facing
away from the rollers.
• Press the unwind shaft firmly back into the receiver
to prevent tension and tracking problems.
• Center the films on the unwind shafts. Measure the
distance from the face of the cabinet and the film
edges (not the cores) and adjust until they are equal.
IMPORTANT! The position of all films,
boards, rolls of media and cardboard cores for
wind-ups must be set central in the laminator to
ensure optimum quality and correct tracking.
• Adjust the brakes and lock collars flush against the
roll ends and tighten the setscrews.
IMPORTANT! Do not over-tighten the
setscrews to prevent stripping the threads.
Figure 7. Loading Roll of Material
Unwind
Shaft film
goes on this
side of brake
Tension ring
Brake tension is fully
released when the tension
ring and collar gap is closed
Brake Collar
Adhesive Side
Adhesive Side
Brake Side
Lock Collar
Lock Collar