


20
MOUNTING
This process involves mounting previously prepared
decals onto a substrate. No films or adhesives are
required for this process.
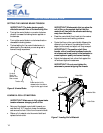
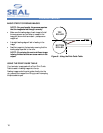
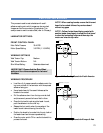
TO MOUNT DECALS ONTO A SUBSTRATE
• Place the mounting board on a flat surface.
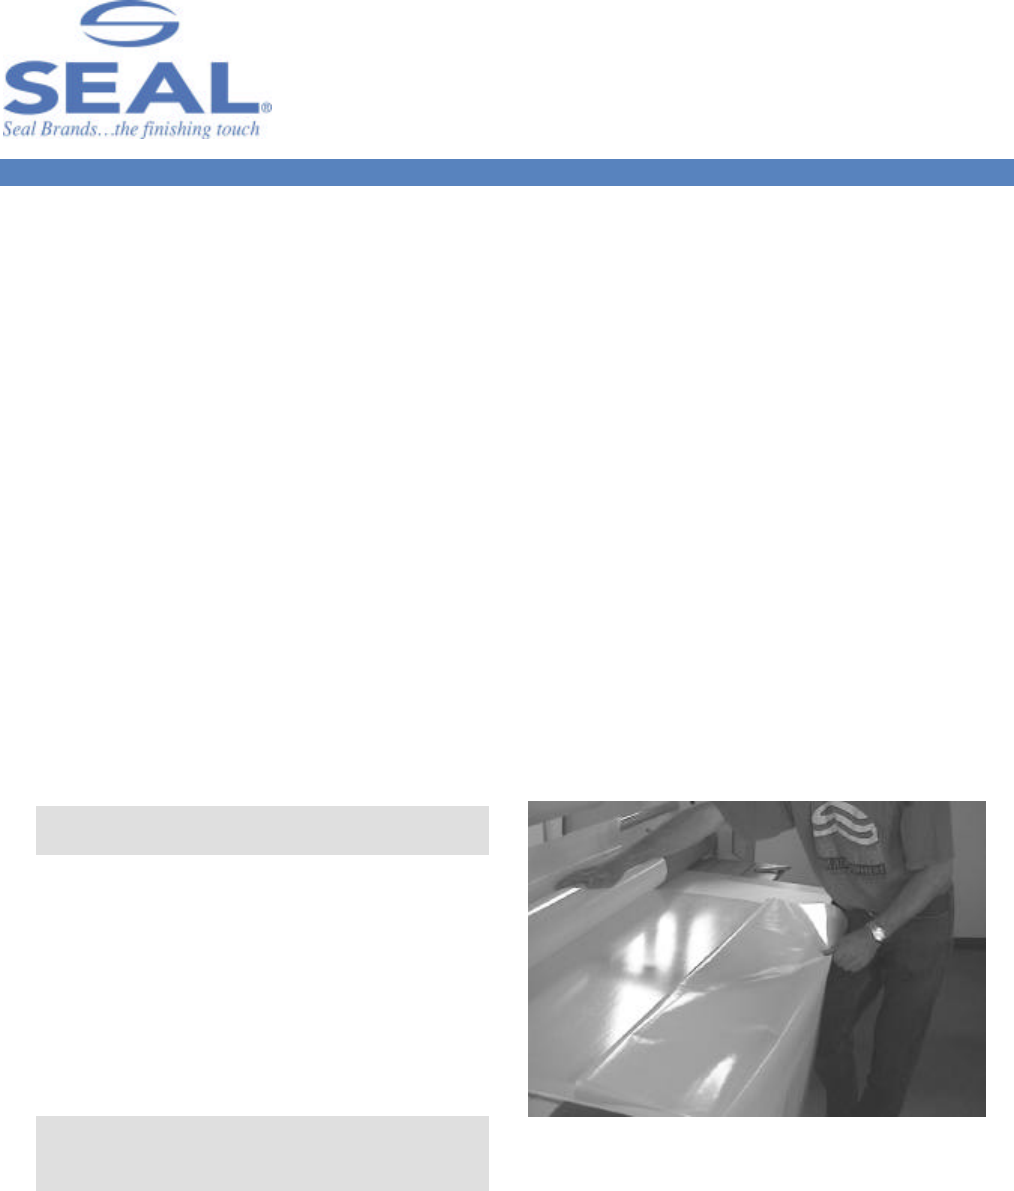
• Lay your image face down on the mounting board
and expose approximately 1” (25 mm) of the
adhesive by peeling back the release liner along one
of the edges.
• Fold the release liner back making an even crease.
• Turn the image over and carefully position the
exposed adhesive edge of the image squarely onto
the board.
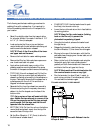
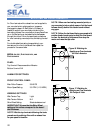
• Once positioned correctly, press the exposed
adhesive edge of the image firmly down onto the
board from the center toward the edges to ensure a
smooth surface. This is the edge that will be fed
into the rollers first.
IMPORTANT! Ensure that the Shim Wheel
settings correspond to the board thickness.
• Push the edge of the board into the rollers and
depress the foot switch until the board and image
are just caught by the nip.
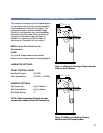
• Flip the un-tacked portion of the image over the top
roller with one hand so that the release liner can be
peeled off the image with the other hand.
• Depress the foot switch to feed the board through
the rollers.
IMPORTANT! Because the foot switch
overrides the photo eye, be sure to keep your
hands clear of the rollers to prevent injury.
• At this point, continuous run can be selected by
pressing the Motor switch ON.
NOTE: Take care that the rollers do not grab
the liner.
• If the board is accidentally sent in too far at first,
the release liner will get caught and will be
impossible to pull back. In this case, stop and raise
the top roller and pull back until the liner can be
pulled away.
• The image must be held against the roller while the
board feeds through to prevent wrinkles.
NOTE: Take care that the release liner does not
trip the optical safety system.
• As the process becomes more familiar, the speed of
the laminator may be increased to make the process
more efficient.
• Remove the mounted image from the rear of the
laminator, trim it to size and display it.
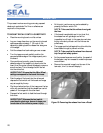
Figure 13. Removing the release liner from a Decal