


13 | CHAPTER 2 – CONFIGURING YOUR HUB
To configure network
management
(SNMP) settings
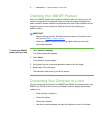
1. Select System > Settings.
The Settings dialog box appears.
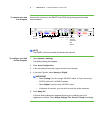
2. If you have a SMART Hub SE240, select Network and Conference, and then
press Management, Room Control.
NOTE
The Room Control feature isn’t available with the SMART Hub VE220.
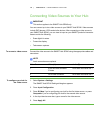
3. Select Use the settings as the SNMP read/write strings to use the general
settings for the SNMP read/write strings.
OR
Select Manually assign SNMP read/write strings, and then enter the
appropriate information (as supplied by your network administrator) to manually
assign the SNMP read/write strings.
– Read community string
– Write community string
4. If you have a SMART Hub SE240, select the Enable remote management of
SMART Hub SE240 checkbox.
OR
If you have a SMART Hub VE220, select the Enable remote management of
SMART Hub VE220 checkbox.
NOTE
In SNMP, community strings are text strings that act as s. “Get” requests are
only valid if their community strings match the value in the Read community
string box, and “Set” requests are only valid if their community strings match
the value in the Write community string box.
5. Type the IP address to which your hub should send traps (as supplied by your
network administrator) in the Trap destination address box.
NOTE
Traps are unsolicited, asynchronous events that devices such as the SMART
Hub uses to indicate status changes.
6. Press Apply All.