2-5
PRINTING
3
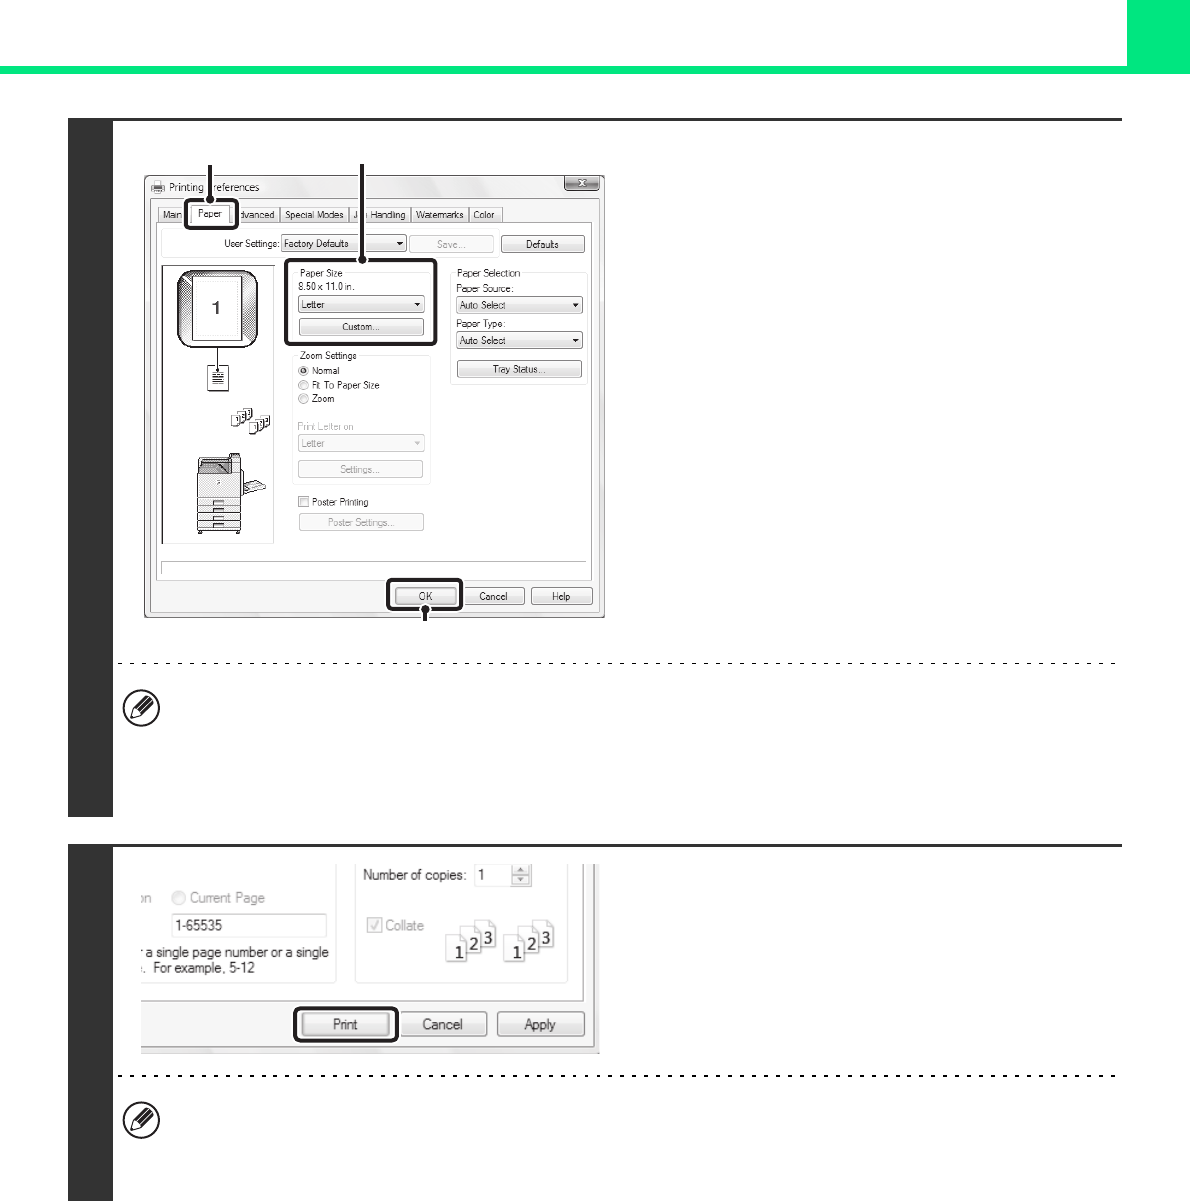
Select print settings.
(1) Click the [Paper] tab.
(2) Select the paper size.
To select settings on other tabs, click the desired tab
and then select the settings.
(3) Click the [OK] button.
• Make sure the paper size is the same as the paper size set in the software application.
• Up to eight custom paper sizes can be stored. Storing a custom paper size makes it easy to specify that size each
time you need to use it.
To store a paper size, select [Custom Paper] or one of [User1] to [User7] from the pull-down menu and click the
[Custom] button.
4
Click the [Print] button.
Printing begins.
In Windows 98/Me/NT 4.0, click the [OK] button.
When removing printed output...
Remove the output horizontally so that it does not get caught on the actuator for output tray full detection.
If the actuator comes off, see "The actuator came off (when a finisher is not installed)" (page 4-22) in "4.
TROUBLESHOOTING".
(1)
(2)
(3)
