


2.PRINTING FROM WINDOWS
Printing with Best Functions for Your Needs 77
2 PRINTING FROM WINDOWS
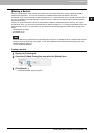
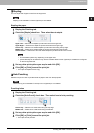
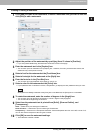
Creating or editing a watermark
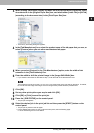
1
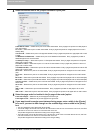
Click [Add] to create a new watermark, or select a watermark that you want to edit and
click [Edit] to edit a watermark.
y The Watermark dialog box appears.
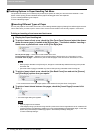
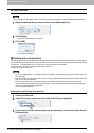
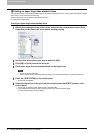
2
Adjust the position of the watermark by specifying X and Y values in [Position].
y If you click [Center Watermark], the watermark comes at the center of the page.
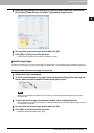
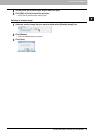
3
Enter the watermark text in the [Caption] box.
y You can enter up to 63 characters for the [Caption] box. However, if too many characters are entered, the
watermark may not be printed correctly.
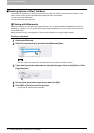
4
Select a font for the watermark at the [Font Name] box.
5
Select a font style for the watermark at the [Style] box.
6
Enter the font size in the [Font Size] box.
y You can enter any integer between 6 and 300pt in units of 1pt.
7
Select a color for the watermark at the [Color] box.
y If your preferred color is not listed in the box, click [Browse...] to display the color palette and add your color.
When [Black and White] is selected at the [Color] box on the Basic tab, the [Color] box is not available.
8
To rotate the watermark, enter the number of degrees in the [Angle] box.
y You can enter from -90 degrees to 90 degrees in units of 1 degree in the [Angle] box.
y You can also set the angle using the scroll bar.
9
Select how the watermark text is printed from [Solid], [Draw as Outline], and
[Transparency].
Solid — Select this to print solid type of watermark.
Draw as Outline — Select this to print an outline type of watermark.
Transparency — Select this for a transparent watermark. Set the transparent ratio from 0 to 100% in units of 1%.
You can also set the transparent ratio using the scroll bar.
10
Click [OK] to save the watermark settings.
y The watermark is added or edited.