


5-21
1
2
3
4
5
6
7
9
10
11
12
8
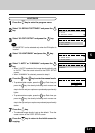
LIGHT/DARK
1
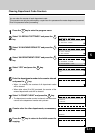
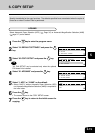
Press the key to enter the program menu.
2
Select “01.DEFAULT SETTINGS” and press the
key.
PROGRAM
01.DEFAULT SETTINGS
02.LISTS
03.INITIAL SETUP
DEFAULT SETTINGS
01.MACHINE DEFAULT
02.COPY SETUP
03.FAX SETUP
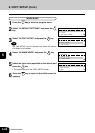
COPY SETUP
01.APS/AMS
02.IMAGE MODE
03.LIGHT/DARK
LIGHT/DARK
1.AUTO
2.MANUAL
3
Select “02.COPY SETUP” and press the key.
4
Select “03.LIGHT/DARK” and press the key.
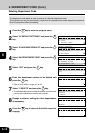
5
Select “1.AUTO” or “2.MANUAL” and press the
key.
• When “1.AUTO” is selected, the image density default is set
to “AUTO.” Then the screen returns to the COPY SETUP
screen.
• When “2.MANUAL” is selected, proceed to step 6.
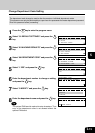
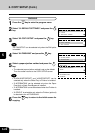
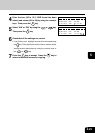
6
Press the or the key to enter the manual mode.
• To produce lighter copies, press the key. Each time you
press the key, the density-indicating mark moves one
step to the left and your copies are produced proportionally
lighter.
• To produce darker copies, press the key. Each time you
press the key, the density-indicating mark moves one
step to the right and your copies are produced proportionally
darker.
7
Press the key.
• The selected image density is set as the default. Then the
screen returns to the COPY SETUP screen.
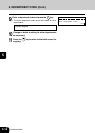
8
Press the key to return to the initial screen for
copying.
Tip
"3. FAX SETUP" can be selected only when the FAX option is
installed.
LIGHT/DARK
MANUAL:
-3-2-10+1+2+3