


4-21
1
2
3
4
5
6
7
9
10
11
12
8
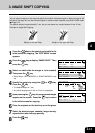
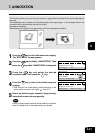
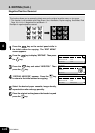
This function allows you to print the page number or page number and date & time on the lead-edge of
the copy.
The annotation area is located on the leading edge of the output paper. In the example shown, the
annotation will be printed along the top of the copy.
Example of annotation:
When placing the original on the glass using A4-R (on landscape) orientation.
7. ANNOTATION
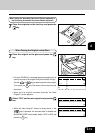
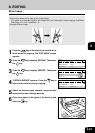
5
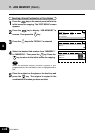
Select the desired paper cassette, image density,
reproduction ratio and copy quantity.
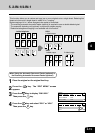
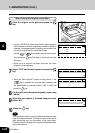
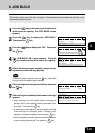
1
Press the key on the initial screen for copying.
The “EDIT MENU” screen appears.
2
Press the key to display “ANNOTATION.” Then
press the key while “ANNOTATION” is displayed.
3
Press the key and select the desired
annotation type. Then press the key.
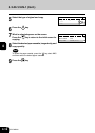
4
Press the key to return to the initial screen for
copying.
• Date and time are automatically printed according to the
format which is preset in the copier. Page 5-21
READY 1
2IN1/4IN1 :OFF
MAGAZINE SORT:OFF
ANNOTATION :OFF
READY 1
2IN1/4IN1 :OFF
MAGAZINE SORT:OFF
ANNOTATION :PAGE NO.+D&T
ANNOTATION 1
OFF
PAGE NUMBER
PAGE NO.+DATE&TIME
Note
Density of page number and date & time added by annotation
does not change even if the image density is changed.