


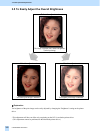
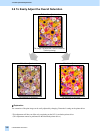

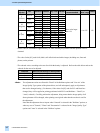
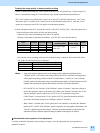
e-STUDIO281c/351c/451c
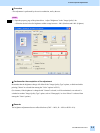
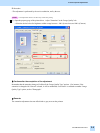
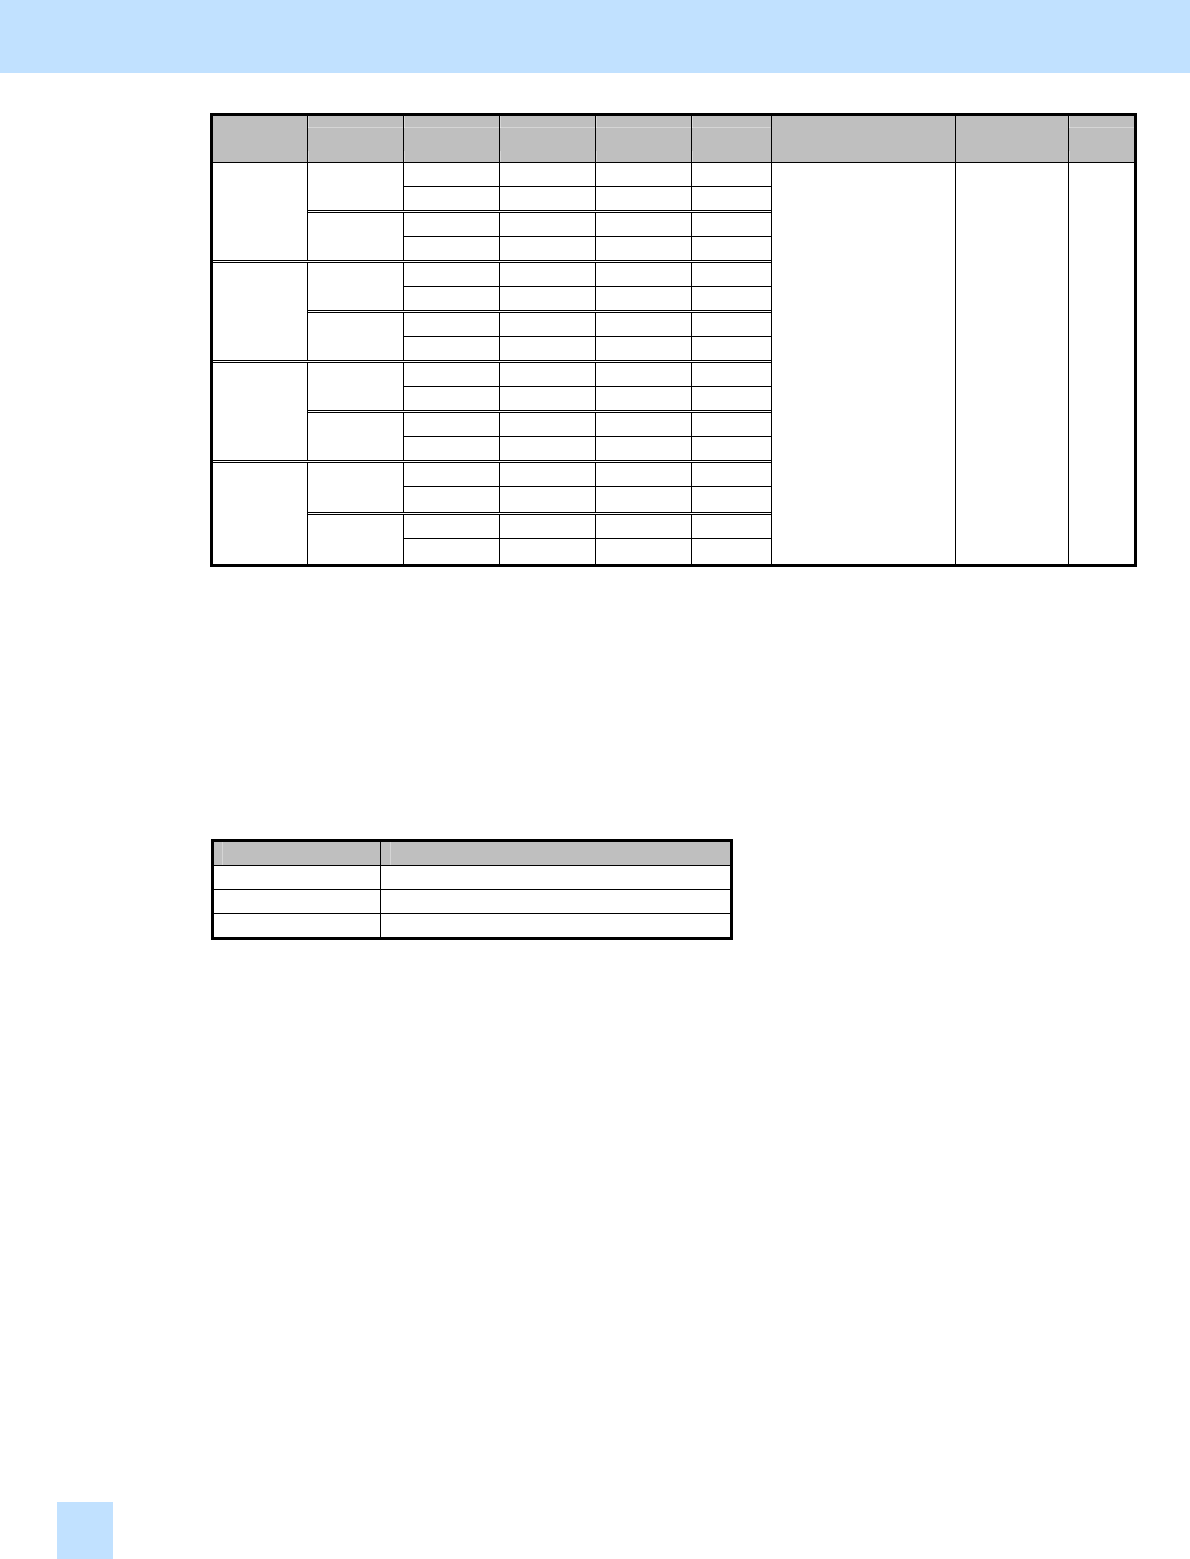
Color to be
adjusted
PDL
Resolution
Halftone [05] code
Subcode
Value
recommended
Acceptable
value range
Default
600 x 600 Detail 05-1030 0/1/2
PCL5c
1200 x 600 Detail 05-1038 0/1/2
600 x 600 Detail 05-1014 0/1/2
Y
(Yellow)
PS3
1200 x 600 Detail 05-1022 0/1/2
600 x 600 Detail 05-1031 0/1/2
PCL5c
1200 x 600 Detail 05-1039 0/1/2
600 x 600 Detail 05-1015 0/1/2
M
(Magenta)
PS3
1200 x 600 Detail 05-1023 0/1/2
600 x 600 Detail 05-1032 0/1/2
PCL5c
1200 x 600 Detail 05-1040 0/1/2
600 x 600 Detail 05-1016 0/1/2
C
(Cyan)
PS3
1200 x 600 Detail 05-1024 0/1/2
600 x 600 Detail 05-1033 0/1/2
PCL5c
1200 x 600 Detail 05-1041 0/1/2
600 x 600 Detail 05-1017 0/1/2
K
(Black)
PS3
1200 x 600 Detail 05-1025 0/1/2
Set a value larger
than 128.
0 to 255 128
* Set the value in increments of approximately 10, while checking the printout until the optimum value is
obtained.
* The value for the [05] code for K (black) will affect black-and-white images (including text, lines and
photos) on the printout.
* The subcode varies, according to the area for which the density is adjusted. Refer to the table below and set the
subcode for the area to be adjusted.
Subcode Area for the density to be adjusted
0 Low-density area
1 Medium-density area
2 High-density area
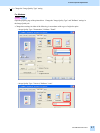
<Note> The adjustment results are reflected in "Detail" of the Halftone options and "Line Art" of the
Image Quality Type options of the printer driver, and will subsequently apply to all printouts
that use the changed setting. (For instance, if the values for [05] code for PCL and Detail are
changed, they will be applied to printing performed with PCL5c and Halftone = "Detail" (or
"Auto") selected.) Carefully perform the adjustment, being aware that the image quality of all
future printouts will be changed, when printing out originals other than the one that is used for
the adjustment.
Note that this adjustment has no impact when "Smooth" is selected in the "Halftone" options, or
when any one of "General," "Photo" and "Presentation" is selected in the "Image Quality Type"
options and "Auto" is selected in the "Halftone" options.
3. Printer-specific Adjustments
3.7