e-STUDIO281c/351c/451c
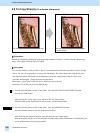
2.11.1 To Adjust the Copy Image Quality of a Black Logo
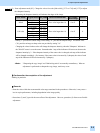
* You can start with any of the procedures. But it is recommended to perform the procedures in order, as listed
below. You can use one procedure in conjunction with another. But if this changes the image quality more
than required or loses effectiveness of the adjustment, restore the settings made in the previously used
procedure to the original. Then perform the next procedure.
* Procedures (1) and (4) are used by the service technician only.
* Procedures (2) and (3) are used by the service technician, and by the user.
(1) Make sure that the color of the solid filled logo is not printed out of register. If it is, perform color
registration control.
* For further information regarding the adjustment procedures, refer to 1.5. To Correct Out-of-register
Colors or the Service Manual.
After correcting out-of-register colors, copy and check the copy image quality.
If further image quality adjustments are still necessary, use the next procedure.
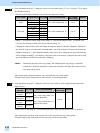
(2) Perform the color balance adjustment to enhance black.
• Use steps (a) through (d) to perform the adjustment.
(a) Press the [IMAGE] button on the Control Panel.
(b) Press the [COLOR BALANCE] button.
(c) Press the [+] button to enhance the tint of [BLACK].
(d) Press the [ENTER] button.
After adjusting the tint of black, copy and check the copy image quality.
With the tint of black set to the maximum, if further image quality adjustments are still necessary, use the
next procedure.
(3) Press the [BASIC] button on the Control Panel. Select "TEXT" from among the original mode options.
* To have "TEXT" selected from among the original mode options by default, refer to procedure (1) in 2.8
To Eliminate Moiré.
After selecting Text mode, copy and check the copy image quality.
If further image quality adjustments are still necessary, the service technician must use the next procedure.
2. Copier-specific Adjustments
2.11


