


August, 2006 COPIER E-STUDIO4500C/5500C
1-33
Installation
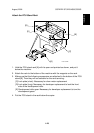
Load the Paper Trays
For each paper cassette tray:
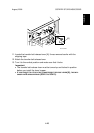
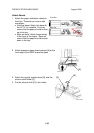
1. Move the side fence and bottom fence to the correct positions for the paper.
2. Add paper to the trays.
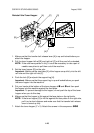
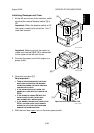
3. Attach the paper size decals to the front of the paper cassette trays and the
tandem tray.
NOTE: It is not necessary to input the paper size setting for trays 2 and 3. This
is detected automatically.
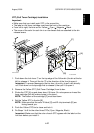
Make a Test Color Print
1. Make sure that A3 or DLT paper is put in one of the trays.
NOTE: Use the same type of paper that the customer normally uses for color
outputs.
2. Put a "Color test chart C-4" on the exposure glass.
3. Select full color mode and print one copy of the chart. You will use this in the
ACC procedure, if ACC is necessary.
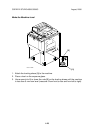
4. Check the results of the copy with the customer.
• If the quality of the color is satisfactory, ACC adjustment is not necessary.
• If the quality of the color is not satisfactory, do the ACC adjustment described
below.
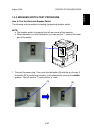
ACC (Automatic Color Calibration) Adjustment
Automatic color calibration is done at the factory with the procedure given below.
Do this procedure only if the color quality is not satisfactory for the customer.
1. Press [User Tools] ().
2. To print a color pattern, select Maintenance> Auto Color Calibration
3. Press "Start".
Machine will start self-check before
printing test pattern
Press [Start Printing].
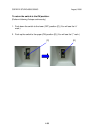
4. Press "Start Printing".
Now self-checking.
Test pattern will be printed.
Please wait.
The machine does process control, then it prints a test pattern.
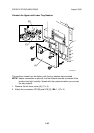
Place Test Pattern on the exposure glass correctly.
Then press [Start Scanning]