User's Manual
4-14
OPERATING BASICS
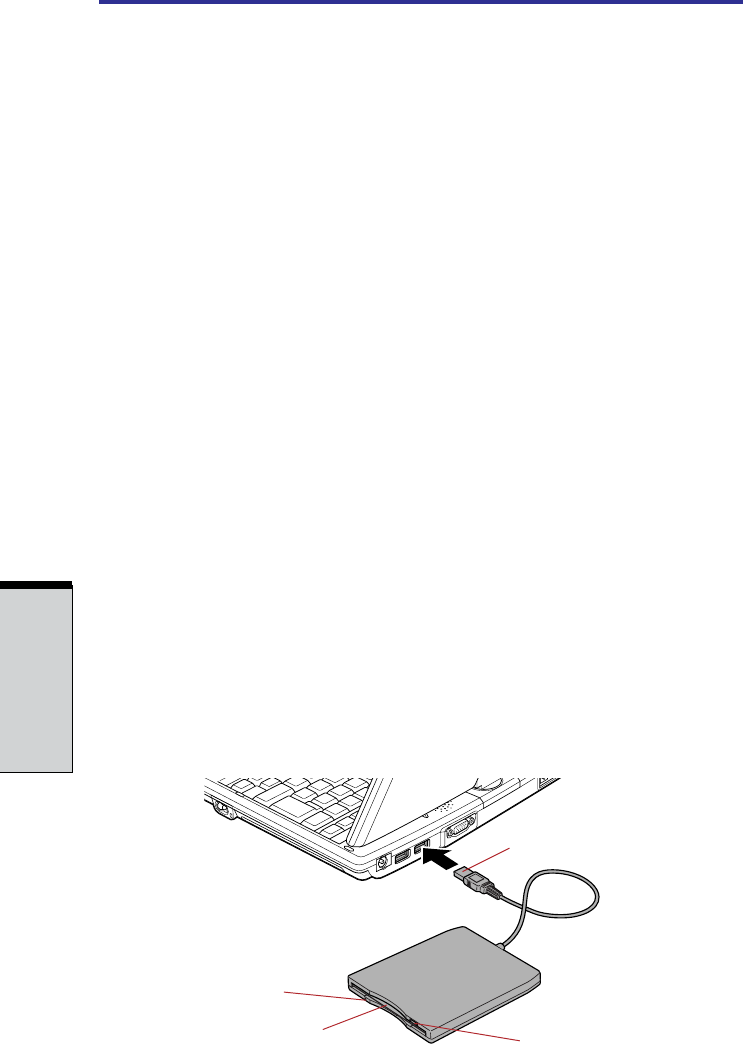
Eject button When a diskette is fully seated in the drive, the eject
button pops out. To remove a diskette, push in the eject
button and the diskette pops out partially for easy removal.
Diskette slot Insert diskettes in this slot.
Disk-In-Use This indicator lights when the diskette is being
Indicator accessed.
CAUTION: Check the Disk-In-Use indicator when you use the diskette
drive. Do not press the eject button, disconnect a drive cable or turn off
the computer while the light is glowing. Doing so could destroy data and
damage the diskette or the drive.
NOTES: 1. The external diskette drive should be placed on a flat,
horizontal surface when in use. Do not set the drive on an
incline greater than 20
o
while it is operating.
2. Do not set anything on top of the diskette drive.
3. If you need to boot the computer from the diskette drive or
if you use an OS that does not support USB, you must set
the USB-FDD Legacy Emulation feature in HW Setup to
Enabled. Refer to the USB section in Chapter 7, HW SetUP.
Connecting the USB diskette drive
To connect the drive, plug the diskette drive connector into a USB port. Refer to
Figure 4-13.
NOTE: Make sure the connector is right side up and properly aligned
with the socket. Do not try to force the connection, doing so can damage
the connecting pins.
Figure 4-14 Connecting the diskette drive to the computer
USB CONNECTOR
DISC-IN-USE INDICATOR
DISKETTE SLOT
EJECT BUTTON
