


23
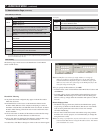
8.2 Webpage Layout
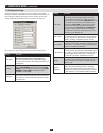
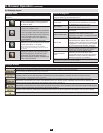
Webpage Icons
The purpose of the icons at the top of the Webpage are explained in the
table below:
Icon Function
Click this icon to display the General dialog box.
See General Dialog Box, for an explanation of
the dialog box fields.
Click this icon to synchronize the KVM switch’s
time with your computer’s time.
If both are in the same time zone, the device’s •
time is changed to match the computer’s time.
If they are in different time zones, the device’s •
time is changed to match the computer’s
time,except that the time zone difference is
still maintained.
Click this icon to install new versions of the
NetDirector Console KVM Switch with IP Access
firmware. See section 7.7 for details.
Note: The Firmware icon only displays for users with administrative
permission. It doesn’t appear on the Webpages of users who don’t have the
proper permission.
You should always click this icon to log out
and end your session. If you close the browser
without first logging out, you will have to wait
approximately one minute before logging in
again unless multiuser operation is enabled (see
section 7.6.6, Customization).
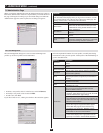
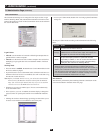
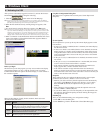
General Dialog Box
The General dialog box is the default Webpage. An explanation of the
dialog box fields is given in the table below:
Field Purpose
Device Name
To make it easier to manage installations that
have more than one KVM switch. You can give
the KVM switch a unique name here.
MAC Address
The NetDirector Console KVM Switch with IP
Access MAC address displays here.
Firmware Version
Indicates the KVM switch’s current firmware
version level.
Network Transfer Rate
Displays the currently selected rate for data
transmission. The network transfer rate is
administrator selectable – see Network Transfer
Rate, section 7.6.3.
Reset on Exit
Select this check box to reset the KVM switch
and implement new settings when you log out.
Following a reset, wait one to two minutes before
logging back in. (This check box is only enabled
for users who have administration privileges.)
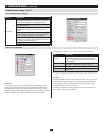
Note: For some changes, the Reset on exit check box is automatically
selected and the KVM switch will reset when you log out. Clearing the check
mark before logging out will cause the new settings to be discarded.
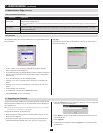
Last IP from DHCP
Server
Displays the current IP address of the
NetDirector Console KVM Switch with IP
Access. Note: This field only appears when the System
Administrator has chosen to obtain an IP Address via a
DHCP server (see section 7.6.3, Network).
Note: New versions of the NetDirector Console KVM Switch with IP Access firmware can be
downloaded from our Website as they become available.
8. Browser Operation
(
continued
)
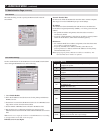
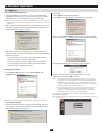
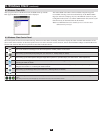
Webpage Buttons
The purpose of the icons at the left of the Webpage are explained in the table below:
Icon Purpose
Click this button to download the Windows Client software to remotely control the connected computer(s).
Note: You must download a new Windows Client each time you log in from your browser.
For platform independence, the Java Client allows users that have Java installed on their computers to connect to the NetDirector Console
KVM Switch with IP Access. Click this button to download the Java Client software to remotely control the connected server(s).
Note: You must download a new Java Client each time you log in from your browser.
In some instances, administrators don’t want the KVM switch to be accessible by browser. Clicking this button allows the System
Administrator to download the API version of the Windows Client. Once browser access is disabled, users will need to obtain the API
program from their System Administrator. API operation is discussed in Chapter 13.
In some instances, administrators don’t want the KVM switch to be accessible by browser. Clicking this button allows the System
Administrator to download the API version of the Java Client. Once browser access is disabled, users will need to obtain the API program
from their System Administrator. API operation is discussed in Chapter 13.
Clicking this button allows an administrator to download and install the Log Server application. See Chapter 12 for Log Server details.
All the events that take place on the KVM switch installation are recorded in a log file. Clicking this icon displays the contents of the log file.