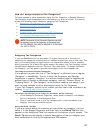
How do I assign receipts to Tax Categories?
track receipts or other documents using the Tax Organizer, a Receipt Date and
T C ion you wish to include. This section
c r signing Tax Categories:
Selecting a Tax Category for a Receipt
To
ax ategory must be assigned to all informat
ove s the following topics related to as
•
Showing and Hiding Tax Categories
•
Adding Comments
•
•
Viewing Quick Tips and Additional IRS Information
•
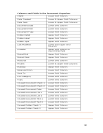
Tax Category Reassignments (2005-2006)
Assigning Tax Categories
If ou use NeatWorks for tax purposes, it's a good idea to get in the habit of
king steps to organize your tax information ahead of time, possibly
saving
(show t
tax ca
T C
It im
"Cate
Organ
gener ipt or document category, such as "Grocery Store," or
ign if you
Organizer.
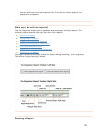
If your Tax Category column is not visible, you can learn how to enable it by
reading
Showing and Hiding Columns
y
assigning tax categories to documents or receipts anytime you scan a new item. This
way, you're ta
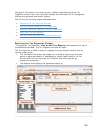
yourself a lot of work during tax season. By default, the Tax Category column
n below) depicts a value of "No form: Non-deductible." To assign a differen
tegory, you can select a pre-defined category from the dropdown list.
ax ategories versus Regular Categories
's portant to point out that a "Tax Category" is different from a regular
gory" in NeatWorks. That is, in both the Document and Receipt
izers, a regular "Category" is a column heading used to describe the
al type of rece
"Lodging/Hotel." A "Tax Category" is the column heading you ass
want to track receipts or other documents using the Tax
.
view and select a tax
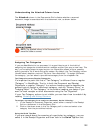
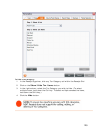
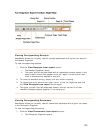
you are unsure about the meaning of a particular tax category, you can
select it in the Receipt Organizer and then look in the
Quick Tip box that
appears in the Additional Field Info section at the bottom of your screen.
The
Quick Tip
section will display a helpful description of the tax category you
have selected and a link to the appropriate IRS website.
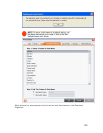
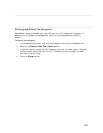
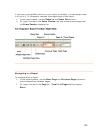
To assign a tax category for a receipt or document, do the following:
1. In the Receipt or Document Organizer, select either a receipt in the Receipt
Grid or a document in the Document Grid.
2. Click on the down arrow in the Tax Category cell to
category from the pre-defined values.
Using the Quick Tips Box
If
127


