


- 92 -
Operation
Date en cours : 11 août 2004
\\Sct01002\BE31-DOC\DOC 31 - En cours\Travaux en cours\Fax\MFL V 2\LU 251 523 984B MFL_V2 FAXCENTRE F116_F116L XEROX
FR_GB_ESP\Anglais\Utilisation.fm
The MBX is initialized. If you wish to initialize another, press C and repeat the same procedure.
To exit the MBX, press .
Modifying the features of a MBX
M 72 OK - MAILBOXES / DEPOSIT MBX
Select a free MBX out of the 31 MBX, or enter the number of a free MBX directly (1-31) and
confirm by pressing OK.
Enter the code of this MBX, if there is one, and confirm with OK.
Select the menu MAILBOX CODE or MAILBOX NAME, then confirm your choice with OK.
Perform data modification of the menu and confirm with OK.
If needed, repeat the last two steps for the other menu.
Printing the contents of a MBX
M 73 OK - MAILBOXES / PRINT MBX
Select a free MBX out of the 31 MBX, or enter the number of a free MBX directly (1-31) and
confirm by pressing OK.
Enter the code of the MBX, if there is one, and confirm with OK.
All documents found in the MBX are printed and the MBX is emptied.
Deleting a MBX
Before deleting an MBX, you need to make sure it is empty, by printing its content.
M 74 OK - MAILBOXES / DELETE MBX
Select a free MBX out of the 31 MBX, or enter the number of a free MBX directly (1-31) and
confirm by pressing OK.
Enter the code of the MBX, if there is one, and confirm with OK.
Press to confirm MBX deletion.
The MBX is deleted and will appear as a free MBX in the list.
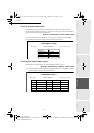
Printing the MBX list
M 75 OK - MAILBOXES / PRT MBX LIST
The list gives the status of each MBX.
MFL 251 523 984_ FAXCENTRE F116_F116 L US.book Page 92 Mercredi, 11. août 2004 4:48 16