


PA/PT400 & PA/PT 403 User’s Guide 9
Getting Ready to Print
Battery
Installing the Battery
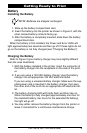
NOTE: Batteries are shipped uncharged.
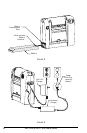
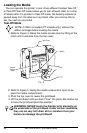
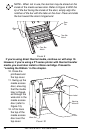
1. Slide up the battery compartment door.
2. Insert the battery into the printer as shown in Figure 2, with the
silver-colored battery contacts facing up.
3. After the battery is completely inserted, slide down the battery
compartment door.
When the battery is first installed, the Power and Error LEDs will
light approximately two seconds and then go off. If these lights do not
go on the battery is not fully charged (see “Charging the Battery”).
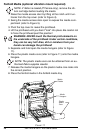
Charging the Battery
Refer to Figure 3 (your battery charger may look slightly different
than the ones illustrated).
1. With the battery installed in the printer, insert the connector of
the battery charger into the receptacle on the side of the print-
er.
2. If you are using a 120 VAC battery charger: plug the battery
charger into an appropriate 120 VAC electrical outlet.
If you are using a universal battery charger: Make sure the sup-
plied power cord is inserted in the battery charger, then plug
the other end of the cord into an appropriate AC electrical out-
let.
3. The battery charging LED will briefly flash and then stay on.
When the battery is fully charged (approximately one hour for
the standard battery; two hours for the extended life battery),
the light will go off.
4. You may either remove the battery charger from the printer or
leave it connected for a continuous maintenance charge.