


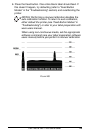
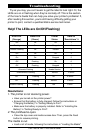


28 PA/PT400 & PA/PT 403 User’s Guide
Calibration
Auto Calibration
NOTE., The printer will not auto calibrate when you are us-
ing pre-printed labels or pre-printed label backing. If you are
using this type of media, see “Manual Calibration. ‘
By default, this printer automatically sets the sensor levels for, and
determines the length of, the label you are using. To auto calibrate:
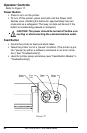
1. Load the media according to the instructions in “Loading the
Media” in Getting Ready to Print.
2. Turn on the printer or press the Feed button if the printer is al-
ready on.
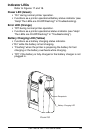
3. Some blank labels will feed, completing auto calibration.
4. If the Error LED begins flashing, refer to “Manual Calibration.”
Hints:
•Auto calibration only works when you are using non-continuous
media (a gap, notch, or black mark separates each label).
• When auto calibration is selected, it occurs when the printer is
turned on (if the printhead has been opened), whenever an er-
ror is cleared, or if the battery (or other power source) has
been removed.
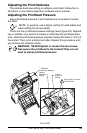
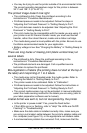
Manual Calibration
A manual calibration should be performed whenever you are using
pre-printed labels (or label backing) or if the printer will not auto cali-
brate.
1. Turn on the printer power.
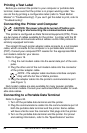
2. Remove 4-6" (102-152 mm) of labels from a section of backing
material. Load the media so that only the backing material is
threaded through the printer and under the printhead.
3. Press and hold the Feed button until the Error LED flashes
once, then twice. Release the button.
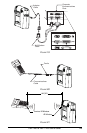
4. The printer will set the media sensor for the label backing you
are using. After it is done making this adjustment, the roll will
automatically feed until a label is positioned at the printhead.
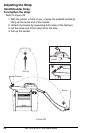
5. A profile of the media sensor settings will print (similar to the
example in Figure 26). Upon completion, the printer will save
the new settings in memory and the printer is ready for normal
operation.