


8ADSL X5 User's Guide
Installing the X5
Installing the X5 involves four steps: Installing the Software,
Installing the Hardware, Establishing Communication, and
Connecting Additional Computers to the Internet.
Step 1: Installing the Software
Important!
This section is for Windows computers only. If you are using a
Macintosh or Linux computer (or you are a Macintosh or Linux
user who is connecting the X5 directly to a network device), skip
this section and begin with the next one, Installing the Hardware
on page 10.
Regardless of how many Windows computers you plan to connect
to the X5, you only have to install the software on one of them.
The Windows computer on which you install the software will also
be the first computer that you physically connect to the X5. It will
also be the computer from which you configure the modem. (The
hardware connection and the modem configuration process are
explained later in this user’s guide.)
Determining which computer to install the software on depends on
how the computers will be connected to the X5:
• If all of your Windows computers will be connected using
their Ethernet ports: You can install the software on any one
of these computers.
• If one of the Windows computers will be connected using
its USB port and the rest using their Ethernet ports: You
must install the software on the computer with the USB port.
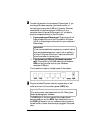
Because the back panel of the X5 modem has one USB port
and four LAN (Ethernet) ports, only one computer can be
connected using a USB port. Note, however, that we
recommend you connect your computers using Ethernet ports,
if possible.