


Adding a WX Switch to the Network Plan 163
9 To modify the management interface, select the IP interface and VLAN
from the VLAN/IP drop-down list.
10 To modify the enable password, edit the string in the Enable Password box.
Use this option when you are creating a new switch in 3WXM. This
option modifies the password in the network plan. However, if the switch
is already deployed in the network, 3WXM cannot apply configuration
changes to the switch unless the enable password in 3WXM matches the
enable password already configured on the switch.
11 Click WX Associations.
12 To change the switch’s Mobility Domain membership, select the
Mobility Domain from the Mobility Domain drop-down list.
To leave the switch out of all Mobility Domains, select Not Assigned.
13 To change the switch’s wiring closet membership, select the closet from
the Wiring Closet drop-down list.
To leave the switch out of all wiring closets, select Not Assigned.
14 Click OK to save the changes and close the wizard.
15 Edit other parameters as required. (See the rest of this chapter and the
following two chapters.)
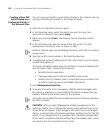
Adding a Switch by
Uploading its
Configuration from
the Network
If you have already deployed a WX switch in the network and you want
to add the switch to the network plan, you can upload the switch’s
configuration into 3WXM, edit the switch, then redeploy the switch with
the new parameters. (See “Uploading a WX Switch into the Network
Plan” on page 66.)
Adding a Switch by
Importing a
Configuration File
You can add a switch to the network plan by importing a switch
configuration file. The configuration is imported in XML format.
1 Use the procedure in “Importing and Exporting Switch Configuration
Files” on page 359 to import the switch’s configuration file.
2 In the Organizer panel, click the plus sign next to the new WX switch to
expand the configuration options.
3 Select a configuration option, then use the instructions in this chapter or
one of the following chapters to modify the configuration information:
Chapter 7, “Configuring Wireless Parameters” on page 235
Chapter 8, “Configuring Authentication, Authorization, and
Accounting Parameters” on page 287