Creating and Managing Users in the Local User Database 289
Creating a Named
User
To create a named user:
1 Access the Create Named User wizard:
a Select the Configuration tool bar option.
b In the Organizer panel, click the plus sign next to the WX switch.
c Click the plus sign next to AAA.
d Select Local User Database.
e In the Task List panel, select Named User.
2 In the Name box, type the name of the user (1 to 60 alphanumeric
characters, with no spaces or tabs).
3 In the Password box, type the password for the user (1 to 80
alphanumeric characters, with no spaces or tabs). You must specify a
password if you want the password to be encrypted in the configuration
file.
4 In the User Group list, select a user group to assign the user to, if the
group is already configured.
You do not need to assign a user to a user group. If you do select a user
group, you only need to specify a password for the user. All other
attributes are obtained from the user group.
5 To set authorization attributes for the user, click Next and go to step 6.
6 In the VLAN Name box, select or type the name of the VLAN that the user
belongs to (1 to 16 alphanumeric characters, with no spaces or tabs). The
WX switch will authorize the user for that VLAN. For more information on
VLANs, see “Viewing and Configuring VLANs” on page 206.
If the user requires administrative access only, you do not need to specify
a VLAN.
Otherwise, if you plan to set authorization attributes in another way, such
as adding the user to a group or configuring default AAA attribute values
for the SSID the user will access, click Finish.
7 In the attribute row you want to configure, click the Attribute Value
column.
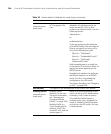
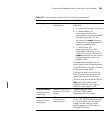
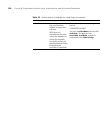
See Table 22 on page 293 for a description of user attributes and their
values.
8 Type the new attribute value in lowercase characters. ACL names are
case-sensitive.


