


Configuring the Switch
3-62
3
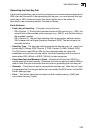
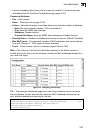
3. Import Client’s Public Key to the Switch – Use the copy tftp public-key
command (page 4-70) to copy a file containing the public key for all the SSH
client’s granted management access to the switch. (Note that these clients
must be configured locally on the switch via the User Accounts page as
described on page 3-54.) The clients are subsequently authenticated using
these keys. The current firmware only accepts public key files based on
standard UNIX format as shown in the following example for an RSA Version 1
key:
1024 35 1341081685609893921040944920155425347631641921872958921143173880
05553616163105177594083868631109291232226828519254374603100937187721199
69631781366277414168985132049117204830339254324101637997592371449011938
00609025394840848271781943722884025331159521348610229029789827213532671
31629432532818915045306393916643 steve@192.168.1.19
4. Set the Optional Parameters – On the SSH Settings page, configure the
optional parameters, including the authentication timeout, the number of retries,
and the server key size.
5. Enable SSH Service – On the SSH Settings page, enable the SSH server on
the switch.
6. Challenge-Response Authentication – When an SSH client attempts to contact
the switch, the SSH server uses the host key pair to negotiate a session key
and encryption method. Only clients that have a private key corresponding to
the public keys stored on the switch can access. The following exchanges take
place during this process:
a. The client sends its public key to the switch.
b. The switch compares the client's public key to those stored in memory.
c. If a match is found, the switch uses the public key to encrypt a random
sequence of bytes, and sends this string to the client.
d. The client uses its private key to decrypt the bytes, and sends the
decrypted bytes back to the switch.
e. The switch compares the decrypted bytes to the original bytes it sent. If the
two sets match, this means that the client's private key corresponds to an
authorized public key, and the client is authenticated.
Notes: 1.
To use SSH with only password authentication, the host public key must still
be given to the client, either during initial connection or manually entered into
the known host file. However, you do not need to configure the client’s keys.
2. The SSH server supports up to four client sessions. The maximum number
of client sessions includes both current Telnet sessions and SSH sessions.