102
Chapter 3: Replacing notebook components
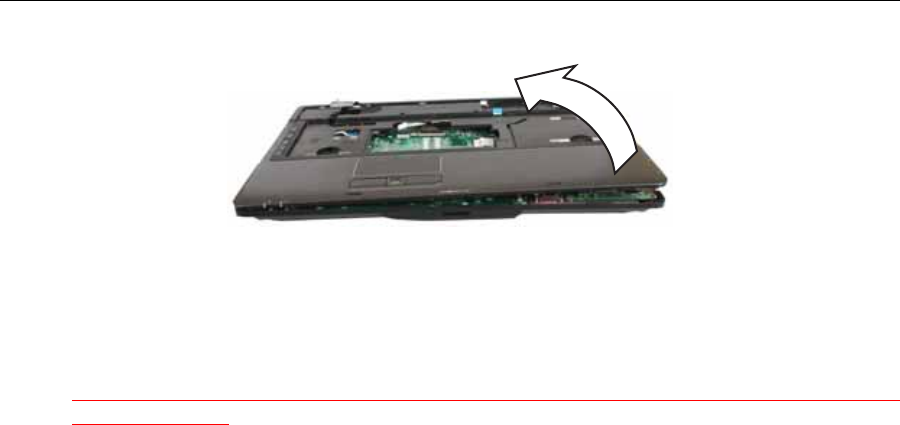
20 Lift the palm rest assembly up from the notebook.
21 Remove the speakers and microphone from the old palm rest and install them on
the new palm rest by following the instructions in “Replacing the microphone and
speakers” on page 103.
22 Remove the touchpad button board/fingerprint assembly from the old palm rest
and install it on the new palm rest by following the instructions in “Replacing the
touchpad button board/fingerprint assembly” on page 106.
<Athena: Do we transfer the green square touchpad board that is on the back side of the
touchpad area?>
23 Remove the button board from the old palm rest and install it on the new palm
rest by following the instructions in “Replacing the button board” on page 109.
24 Route the microphone and speaker cables under the system board.
25 Place the new palm rest assembly onto the notebook, then snap the assembly into
place.
26 Replace the screws removed in Step 13.
27 Make sure the black power button board connector clip is swung upward, insert
the cable into the connector, then swing the clip down to lock the connector in
place.
Important: The cable is correctly oriented if it is not twisted and the blue
band is facing up.
28 Make sure the black button board connector clip is swung upward, insert the cable
into the connector, then swing the clip down to lock the connector in place.
Important: The cable is correctly oriented if it is not twisted and the blue
band is facing up.
29 Make sure the black touchpad cable connector clip is swung upward, insert the
cable into the connector, then swing the clip down to lock the connector in place.
Important: The cable is correctly oriented if it is not twisted and the blue
band is facing up.
30 Connect the finger print reader cable to the system board.
31 Replace the keyboard plate removed in Step 8.
32 Turn the notebook over so the bottom is facing up.
33 Replace the screws removed in Step 17.
34 Connect the microphone and speaker cables to the system board.
35 Replace the LCD assembly by following the steps in “Replacing the LCD assembly”
on page 84.
36 Replace the keyboard by following the steps in “Replacing the keyboard” on page
80.
37 Replace the keyboard cover by following the steps in “Replacing the keyboard
cover” on page 78.
38 Replace the hard drive(s) by following the steps in “Replacing the primary hard
drive” on page 64 and “Replacing the secondary hard drive” on page 73.
39 If the notebook has wireless networking built in, reconnect the wireless antennas
by following the steps in “Replacing the IEEE 802.11 wireless card” on page 67.
40 Replace the wireless bay cover by following the steps in “Replacing the IEEE 802.11
wireless card” on page 67.


