


3 Upgrading your system
48
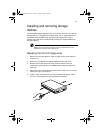
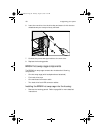
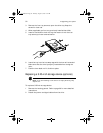
6 Insert the new drive into the drive bay and secure it with the two
chassis screws you have previously removed.
7 Connect the power and signal cable to the new drive.
8 Replace the housing panels.
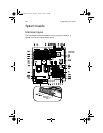
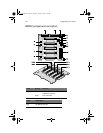
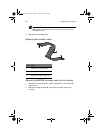
BPL5M hot-swap cage components
The BPL5M hot-swap cage contents box includes the following
components:
• One hot-swap cage (with backplane board attached)
• Five hard drive trays
• One mainboard connector cable
• Two hard drive fault LED connector cables
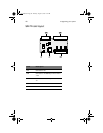
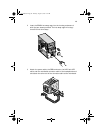
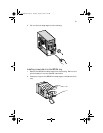
Installing the BPL5M hot-swap cage into the housing:
1 Remove the housing panels. Refer to page 38 for more detailed
instructions.
AA G600.book Page 48 Thursday, August 23, 2001 2:31 PM