


3 Upgrading your system
52
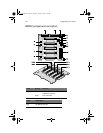
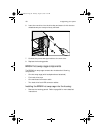
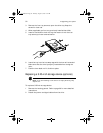
3 Remove the four tray screws to open the drive tray. Keep the
screws for later use.
4 When applicable, pull out any previously installed hard disk.
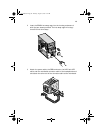
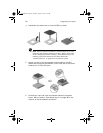
5 Install a hard disk on the drive tray then secure it with the four
tray screws you have removed earlier.
6 Insert the tray into the hot-swap cage with the lever still extended.
Make sure that the drive is properly inserted before closing the
lever.
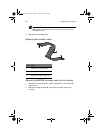
7 Push the lever back until it clicks into place.
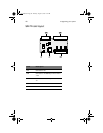
Replacing a 5.25-inch storage device (optional)
Note: If you are installing a new drive in an empty drive bay, skip
steps 2 to 4.
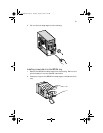
To replace a 5.25-inch storage device:
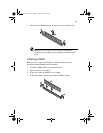
1 Remove the housing panels. Refer to page 38 for more detailed
instructions.
2 Detach the power and signal cables from the drive.
AA G600.book Page 52 Thursday, August 23, 2001 2:31 PM