


55
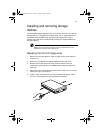
Removing and installing the CPU
Your system’s Pentium
III processor comes in a FC-PGA 370-pin package.
The FC-PGA package is designed for the new breed of sleek, high
performance, small form factor PCs.
The system board supports a Pentium III processor running at 600/133
to 866/133 MHz, and future generations of Pentium CPUs.
Caution: Always observe the ESD precautions when installing or
removing a system component. Refer to page 35.
Removing a CPU
Follow these steps to remove a CPU:
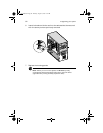
1 Remove the housing panels. See page 38 for more detailed
instructions.
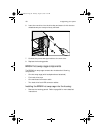
2 Locate the CPU socket on your system board.
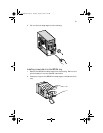
3 Disconnect the 3-pin and 2-pin fan/heatsink cables from the system
board.
4 Unhook one side of the fan/heatsink metal bracket and gently lift
it before removing the other side.
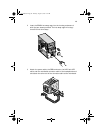
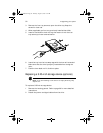
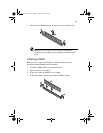
5 Gently press the socket lever down to release the lever and then
pull it up to a 90° angle .
6 Pull out the CPU from the socket.
Installing a CPU
Before you proceed make sure that there is no CPU installed in the CPU
socket. Follow the steps below to install a CPU:
1 Locate the CPU socket on your system board.
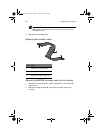
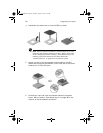
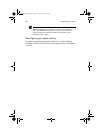
2 Raise the socket lever up to a 90° angle.
3 Remove the new CPU from its protective packaging and insert it
into the CPU socket. Make sure that pin 1 (indicated by a notched
corner) of the CPU connects to hole 1 of the socket.
AA G600.book Page 55 Thursday, August 23, 2001 2:31 PM