


Doing a clean installation
The steps in this section outline what is commonly called a “clean”
installation of system software. A clean installation allows you to discover
which item in your System Folder is causing a problem. A clean installation
creates a brand new System Folder and saves everything in your original
System Folder in a different location. You can then follow the instructions in
“Replacing Special Software,” next, to reinstall system extensions, control
panels, and other special software one at a time from the old System Folder to
the new System Folder. This procedure allows you to determine which item
in the old System Folder was the source of the problem.
Do a clean installation if you can’t determine what is damaged in your System
Folder (especially if you think any special software, such as control panels,
system extensions, or custom utilities, may be causing the problems you’re
experiencing). You should also do a clean installation if you’re still having
problems with your computer after you’ve reinstalled system software by
doing a normal installation.
To do a clean installation, follow these steps:
1 Start up your computer from the
Disk Tools
disk.
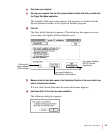
2 Find and open the Disk First Aid icon.
After Disk First Aid starts, follow the instructions on the screen. Disk First
Aid checks your hard disk for any problems.
3 When Disk First Aid has finished checking your hard disk, choose Quit from the File
menu.
4 Open the Drive Setup program.
You use the Drive Setup program to update your hard disk.
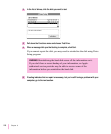
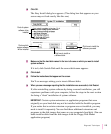
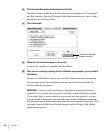
5 In the list of drives, click your startup disk.
6 Pull down the Functions menu and choose Update Driver.
7 When the update process is finished, quit Drive Setup.
114
Chapter 8