


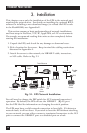


20
ETHERNET PRINT SERVER
Press <Insert> to create a new entry and add the EPS1 name (EPS_xxxxxx
by default) and hit <Enter>.
Enter Print Server Name:EPS_xxxxxx
This is the name that the EPS will log in as when querying the file server’s
print queues. If you later change the EPS’s name, you will need to update the
file server(s).
NOTE: If you ever change the login password on the EPS, you will need to add a password for
the entry you just added. Highlighting the EPS name and pressing <Enter> shows the
“Print Server Information” menu, where you change the password for the EPS name.
If the EPS1 password is the factory default, it is not sent to the fileserver and therefore
does not need to be added explicitly.
2c. Use <Insert> to add the name EPS_xxxxxx_S1 and press <Enter>.
2d. Use <Insert> to add the name EPS_xxxxxx_P1 and press <Enter>.
Return to the main “Available Options” menu by pressing <Esc>.
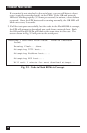
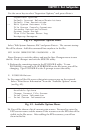
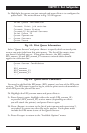
3. Create a print queue on the file server and associate it with the EPS
services. Select the “Print Queue Information” menu option under
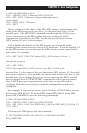
“Available Options” and press <Enter> (see Fig. 4-4).
Available Options
Change Current File Server
-> Print Queue Information
Print Server Information
Fig. 4-4. Available Options.
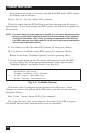
This shows a list of configured print queues on the file server. Press
<Insert> to create a new queue on the file server, type the new queue name
and press <Enter>.
New Print Queue Name:EPS1Q [for example]
The name does not have to be related to the name of the EPS resources,
but should be short and convenient for users to remember.