


24
ETHERNET PRINT SERVER
The Berkeley remote printing system is supported on many machines, and
is simple to configure for the EPS. You need to add the host queue name into
/etc/printcap, and then specify the remote nodename (EPS) and the service
name on the EPS. For example, if you wish to add a print queue for an EPS
with a hardware address of 00-80-A3-56-00-3E, you might add its IP address
192.70.10.10 eps1_lab
to the /etc/hosts file, and
r_eps1|Printer on LAB EPS1:\
:rm=eps1_lab:\
:rp=EPS_56003e_S1:
to the printcap file. This will create a queue named r_eps1 on the host and
link it to the EPS’s serial port - notice the EPS_xxxxxx_S1 queuename. The
setting for rm is the name of the EPS in the host’s address file, not necessarily
what the EPS1’s own name is. The rm and rp options (remote nodename and
queuename, respectively) are system-dependent and may have different
names on your system. See your host’s documentation (or man pages) for
details.
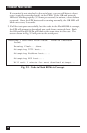
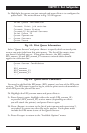
After adding the EPS queue to the printcap file, it should be visible via the
“lpc status” command:
% lpc status
r_eps:
queuing is enabled
printing is enabled
no entries
no daemon present
Printing uses the normal “lpr” command:
% lpr -Pr_eps1 filename
Remember, r_eps1 is whatever name you gave the queue in the printcap
file. Note that the EPS does not implement all the lpr options, because the
print job information is not available until the print job is completed. Simple
options such as banner page and tab expansion may be provided by the EPS,
but will depend on the host’s implementation of remote-lpr.