


21
CHAPTER 4: Host Configuration
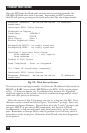
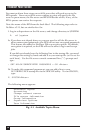
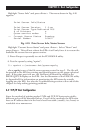
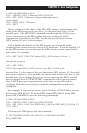
3a. Highlight the queue you just entered and press <Enter> to configure the
queue itself. The menu shown in Fig. 3-5 will appear.
Print Queue Information
Current Print job entries
Current Queue Status
Currently Attached Servers
Print Queue ID
Queue Operators
-> Queue Servers
Queue Users
Fig. 4-5. Print Queue Information.
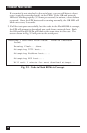
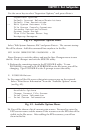
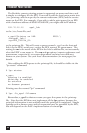
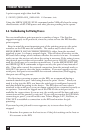
Select “Queue Servers” and press <Enter> to specify which network print
servers can print jobs from this print queue. The list will be empty, since
you haven’t selected any yet. If you press <Insert>, the EPS_xxxxxx,
EPS_xxxxxx_S1 and EPS_xxxxxx_P1 resources entered above should
appear in a selection list:
Queue Server Candidates
...
EPS_xxxxxx
EPS_xxxxxx_P1
EPS_xxxxxx_S1
...
Fig. 4-6. Queue Server Candidates.
You need to add both the EPS name (EPS_xxxxxx) and one of the EPS print
services. The EPS name is used to log in, and the print service determines to
which EPS port the jobs will be sent.
3b. Highlight the EPS_xxxxxx name and press <Enter>.
3c. Press <Insert> again, highlight either the serial (EPS_xxxxxx_S1)
or parallel (EPS_xxxxxx_P1) service name (depending on where
you will attach the printer) and press <Enter> again.
3d. Press <Escape> to return to the list of print queues and repeat step 3,
as needed, to create any other file server queues. Each queue must
include the EPS name as one of the Queue Servers.
3e. Press <Escape> to return to the “Available Options” menu.