


USER’S GUIDE
2–24
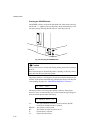
Checking the Printed Test Pattern or Demo Page
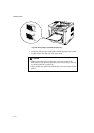
After you print out the test pattern or demo page as described in the
previous section, take a look at the printed sheet to check print quality.
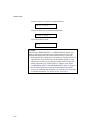
The printer has been shipped with the print density properly adjusted with
the control panel switches. If you are not satisfied with the printout (too
light or dark for example), adjust the print density as follows:
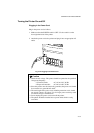
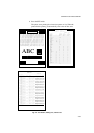
1. Turn on the printer.
2. Press the SEL switch to set the printer off-line state.
3. Press the MODE switch.
4. Press the ▲ or ▼ switch to scroll through the display until the
“ADVANCED MODE” appears.
5. Press the SET switch.
6. Press the ▲ or ▼ switch to scroll through the display until the “PRINT
DENSITY” appears.
7. Press the SET switch.
8. Press the ▲ or ▼ switch until the desired print density value appears.
The value can change from 1 (light) to 15 (dark).
9. Press the SET switch.
10. Press the SEL switch to exit from the mode menus and set the printer
on-line state.
For more information, see “MODE Switch” in Chapter 4.