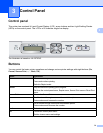
Control Panel
77
3
Back 3
Pressing Back when the printer is in the Ready state takes it offline, and the LCD will show the control panel
menu.
Pressing Back allows you to return to the previous level from the current menu level.
Back also allows you to choose the previous digit while setting numbers.
When you choose a setting and it does not have an asterisk (OK was not pressed), Back allows you to return
to the previous menu level with the original setting unchanged.
OK 3
Pressing OK when the printer is in the Ready state takes it offline, and the LCD will show the control panel
menu.
Pressing OK allows you to choose the displayed menu or option. After changing a setting, the LCD shows
Accepted and then the printer returns to the previous menu level.
Note
The options you have chosen are shown with an asterisk at the end of the display. Since the asterisk
shows what you have chosen, you can easily see the current settings as you look through the LCD.
LEDs 3
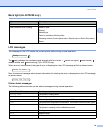
The LEDs are lights which show the printer status.
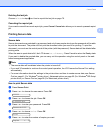
LCD 3
The LCD shows the current printer status. When you use the buttons on the control panel, the LCD will
change.
If there are any problems, the LCD will show the error message, maintenance message or call service
message so you will know that you need to take action. (For more information about these messages, see
LCD messages on page 143.)
Data LED (Green)
LED indication Meaning
On Data is in the printer memory.
Blinking Receiving or processing data.
Off No remaining data in the memory.
Error LED (Orange)
LED indication Meaning
Blinking There is a problem with the printer.
Off There is no problem with the printer.


