


III-8
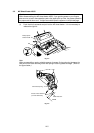
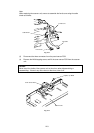
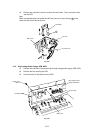
When replacing the heat roller cleaner with a new one, attach the cleaner referring to
the figure below;
Fig. 3-10
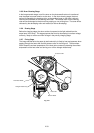
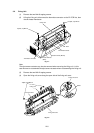
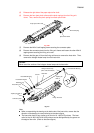
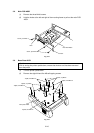
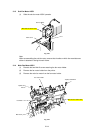
Follow the instructions below when installing the thermistor in the fixing unit.
i) Place the cleaner felt of the cleaner ASSY for the thermistor under the heat roller.
ii) Place the end of the thermistor on the heat roller.
iii) Insert boss1 of the thermistor into the hole of the fixing unit frame.
iv) Do no place the thermistor on boss2 of the fixing unit frame.
Fig. 3-11
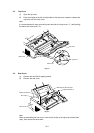
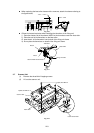
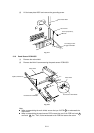
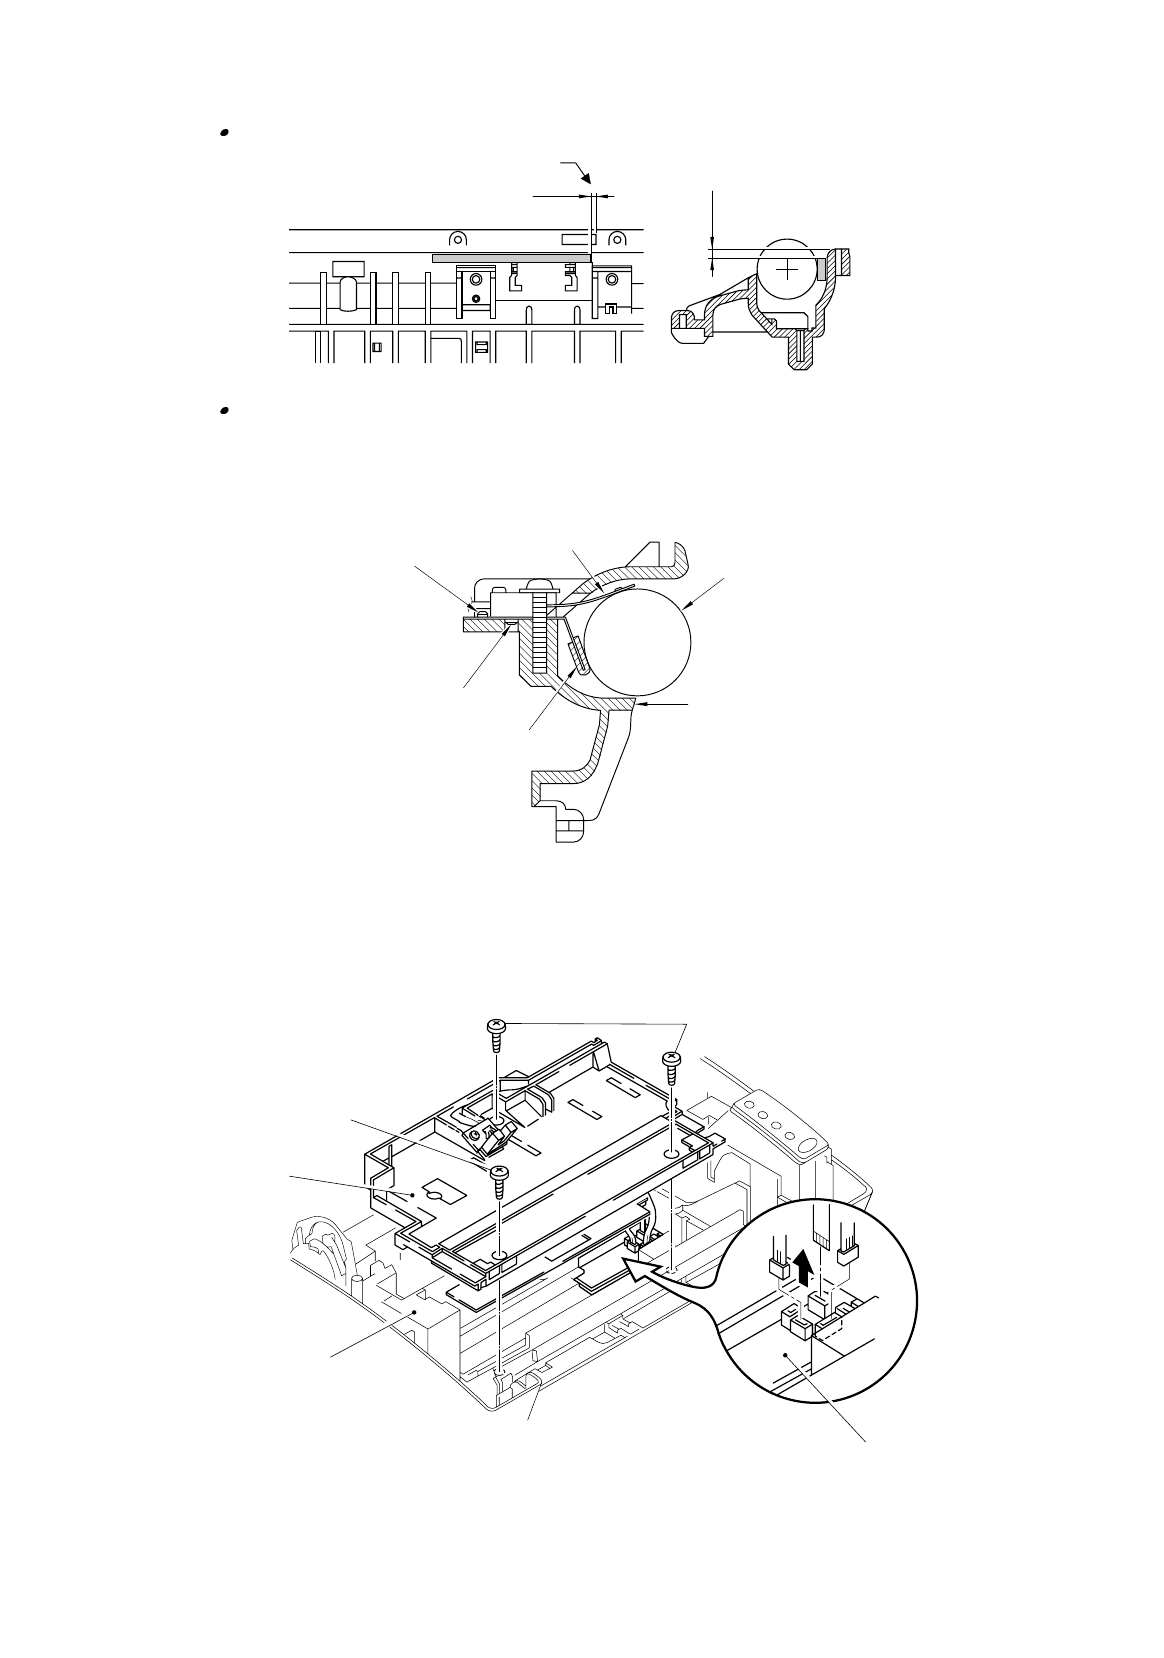
3.7 Scanner Unit
(1) Remove the three M4x12 tapping screws.
(2) Lift out the scanner unit.
Fig. 3-12
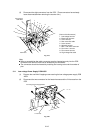
Thermistor
Taptite, bind M4x12
Heat Roller
Fixing unit frame
Scanner Unit
Boss2
Main cover
Boss1
Panel Sensor PCB
Cleaner ASSY for thermistor
Taptite, bind M4x12
-1mm ~ +1mm
4mm ~ 5mm