Using the Touch Panel Display (Optional:PA-TDU-001) (TD-2120N/2130N only)
87
10
d Press [OK] to apply the edited text, and
then press the (Print) button. A
message to confirm the number of
copies appears.
e Type in the number of copies to be
printed, and then press the (Print)
button or [OK]. The labels are printed.
Printing Using the One-Touch
Panel 10
If a label layout has been assigned to a key
on the one-touch panel, a label can easily be
printed simply by pressing the key of the
corresponding label.
a Turn on the printer. The main screen
appears.
b If databases are assigned to one-touch
keys:
Press [a] or [b] to select a template.
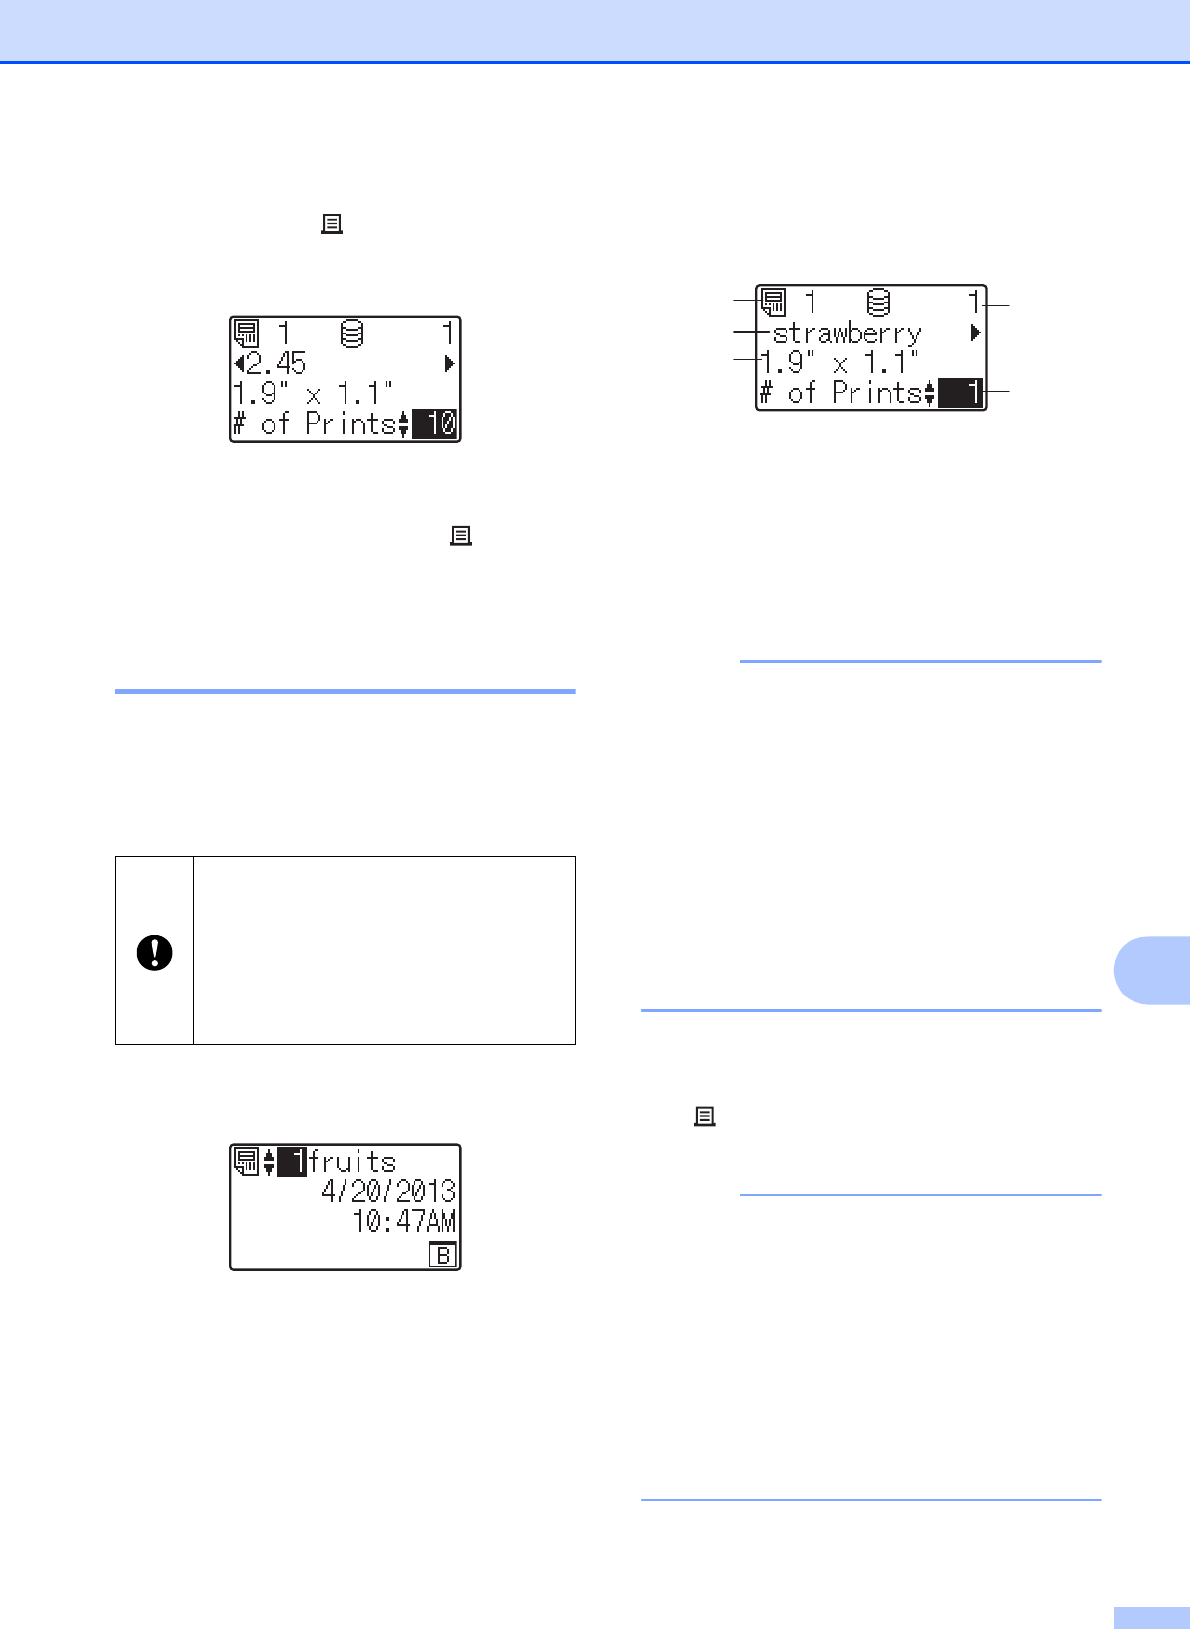
c Press the one-touch key for the label to
be printed. The label details appear in
the screen.
1 Template number
2 Text in label layout
3 Paper size
4 Database record number (only if a
database is linked)
5 Number of prints
NOTE
• Press [d] or [c] to check all of the text in the
label layout. If the one-touch panel (B) is
being used, the data cannot be edited.
Use the basic control panel (A) to edit the
data. For details, see Editing Label
Contents Before Printing on page 86.
• The text displayed on the LCD and its
display order are set by using P-touch
Editor 5.0. For details, see Setting the
Text and Order for Displaying on the LCD
on page 79.
d With [a] or [b], type in the number of
copies to be printed, and then press the
(Print) button or [OK]. The labels are
printed.
NOTE
• The number of copies to be printed can be
set between 1 and 999.
• If the template contains a serialized
number, the labels will be printed with the
serialized field incremented by the
specified number of times.
•If [Confirm Print] is set to [Off],
printing begins when the one-touch key is
pressed in step c.
The data registered with each one-
touch key, is determined by the
database number or the key number
when the data was transferred from the
computer to the printer. For details, see
Transferring the Label Layout to the
Printer on page 82.
4
5
1
2
3


