TeraStation User Manual 16
Opening the Web Admin interface
To congure your TeraStation, use the Web Admin interface from a browser on a computer connected to the same
network.
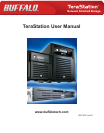
Launch NAS Navigator2. For Windows, click on the [BUFFALO NAS Navigator2] icon on your desktop. For Mac OS 1
X, double-click on the [NAS Navigator2] icon in the Dock.
2
3
Note:
• To login as a guest, type “guest” for the Username, leave the password blank, and click [OK]. Guests can check the
TeraStation’s name, IP address, workgroup, and disk status. Regular users can change their login passwords as well
as check the TeraStation name, IP Address, workgroup, and disk status. Administrator user, “admin” by default, can
congure all options.
4
Notes:
• The Web Admin interface supports Firefox 1.5 or later, Internet Explorer 6.0 with SP2 or later, and Safari 3 or later. It
may not display properly in other browsers.
• The Web Admin interface may not display correctly in Internet Explorer due to your browser security settings. If
this happens, navigate to [Tools] - [Internet Options] - [Security] on Internet Explorer, and set the Security Settings to [Local
intranet].
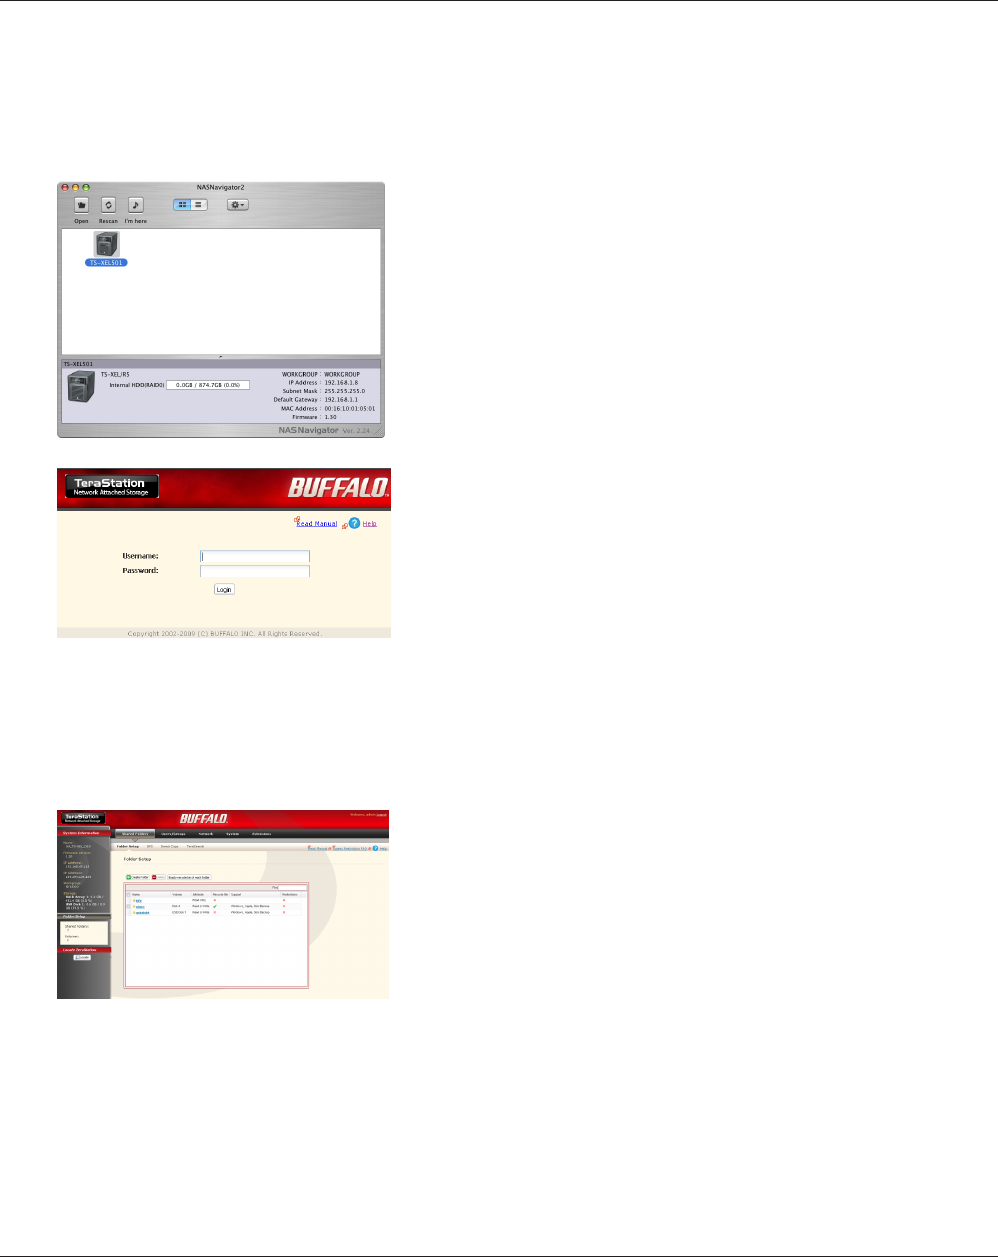
Enter your username and password, and click [Login]. 1
Initially, use the default username and password:
Username: admin
Password: password
After you log in, change the password for security.2
Right-click on the TeraStation icon (on Mac OS X, click the icon
while holding down the control key) and select [Open Web
setting] from the menu.
Notes:
• If multiple TeraStations and TeraStations are connected to
the network, multiple icons will be displayed. Click on the
correct TeraStation.
• Record the TeraStation’s IP address from the bottom right of
the NAS Navigator2 window.
This is the Web Admin interface. This page displays the
TeraStation’s current status, including name, IP address,
workgroup, and hard disk settings.