


Scanning
8-12
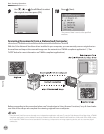
Basic Scanning Operations
6
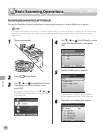
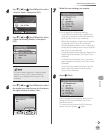
Start the TWAIN-compliant application to
select Color Network ScanGear as the
scanner to be used.
The command names for this operation
includes [Select a scanner], [Select a device],
etc. depending on the application you are
using. For details, see the documentation that
comes with the application software used.
For the operation procedures for starting the
Color Network ScanGear driver to scan images
from an application software, see “Scan,” in the
e-Manual. You will nd the operation
procedures using Microsoft Word 2007 and
2003.
7
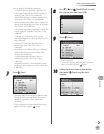
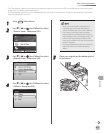
From the menu of the application
software, select the command to start the
Color Network ScanGear driver.
The command names for this operation includes
[New scan], [Import from TWAIN source], etc.
depending on the application you are using. For
details, see the documentation that comes with
the application software used.
When you select the command to start the Color
Network ScanGear driver, and if it does not start
and an error message such as “Scanner is not
connected.” appears, check if all the setups are
complete for scanning originals from a computer.
(See “Introduction to Using Scanner Functions,” on
p. 8-4.)
–
–
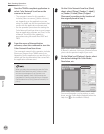
8
On the Color Network ScanGear [Main]
sheet, select [Platen], [Feeder (1-sided)],
or [Feeder (2-sided)] from [Original
Placement] according to the location of
the original placed in step 5.
If [Platen] is selected, clicking on [Preview] allows
you to see the preview image of your scan.
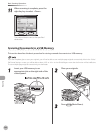
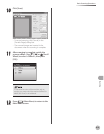
9
On the [Main] and [Options] sheets, select
the desired settings for Color Mode,
Resolution, etc.
For more information on the settings on each
sheet, see the Online Help (displayed when the
Help icon on the toolbar is clicked).